

The Weekly Recap #66
Recipe: Crème Anglaise Ice Cream Base

Welcome to The Weekly Recap and hello to my new subscribers! Here’s a lite Sunday read about my life and food. This email is free and if you are not currently receiving them in your inbox, click that subscribe button below.
If you would like to see daily pictures and videos from behind the scenes of all my cooking, head to my Instagram and give me a follow.
The Kitchen Club recipes are available to paying subscribers and a new recipe is sent out every Wednesday. Some past recipes include Toasted Oat + Pecan Cookies and Lamb Burgers + Tzatziki and Fennel Slaw. Join us in the club to start receiving recipes in your inbox every Wednesday!
Welcome to September! One of the best months of the year if you ask me. It is a transitional month. A time where we are still hanging on to summer by grilling and spending time outside. The weather decides to cool down to a tolerable warmth but the leaves haven’t started falling yet. You might be able to whip out a nice cashmere sweater at night while still wearing jean shorts. The best! Figs, apples, and some early squashes are abundant. School used to start back up in September, what happened to that? It is also my birthday month. Hello, Virgo season!
Fall is in full swing behind the scenes with my recipe development but I embraced the last week of August by making a few batches of ice cream. The first was a goat milk mint chocolate chip flavor. I popped a small mint plant in the ground this spring and it has exploded. I thought I could a good amount of the bush for a batch of ice cream. It had a wonderful mint flavor but I didn’t even make a dent in the overgrown bush.

The texture from using goat’s milk was off this batch. It’s never as creamy as cow’s milk but normally it is decent. I add more fat by using some extra egg yolks. This time it was light and almost icy. After the fact, I thought about how nonfat milk powder is used to improve creaminess sometimes. Meyenberg sells goat milk powder and next time I make a batch I am going to play around with adding some.
The second batch I made was classic vanilla. I used cream and milk from Shatto Milk Company, a local dairy farm, and vanilla bean plus a splash of vanilla I purchased in Mexico. As an experiment, I added an extra egg yolk…woah baby! This ice cream is mind-blowing. The vanilla flavor is out of this world and it is almost too creamy. It’s decadent and a real treat. A little goes a long way and I love it!
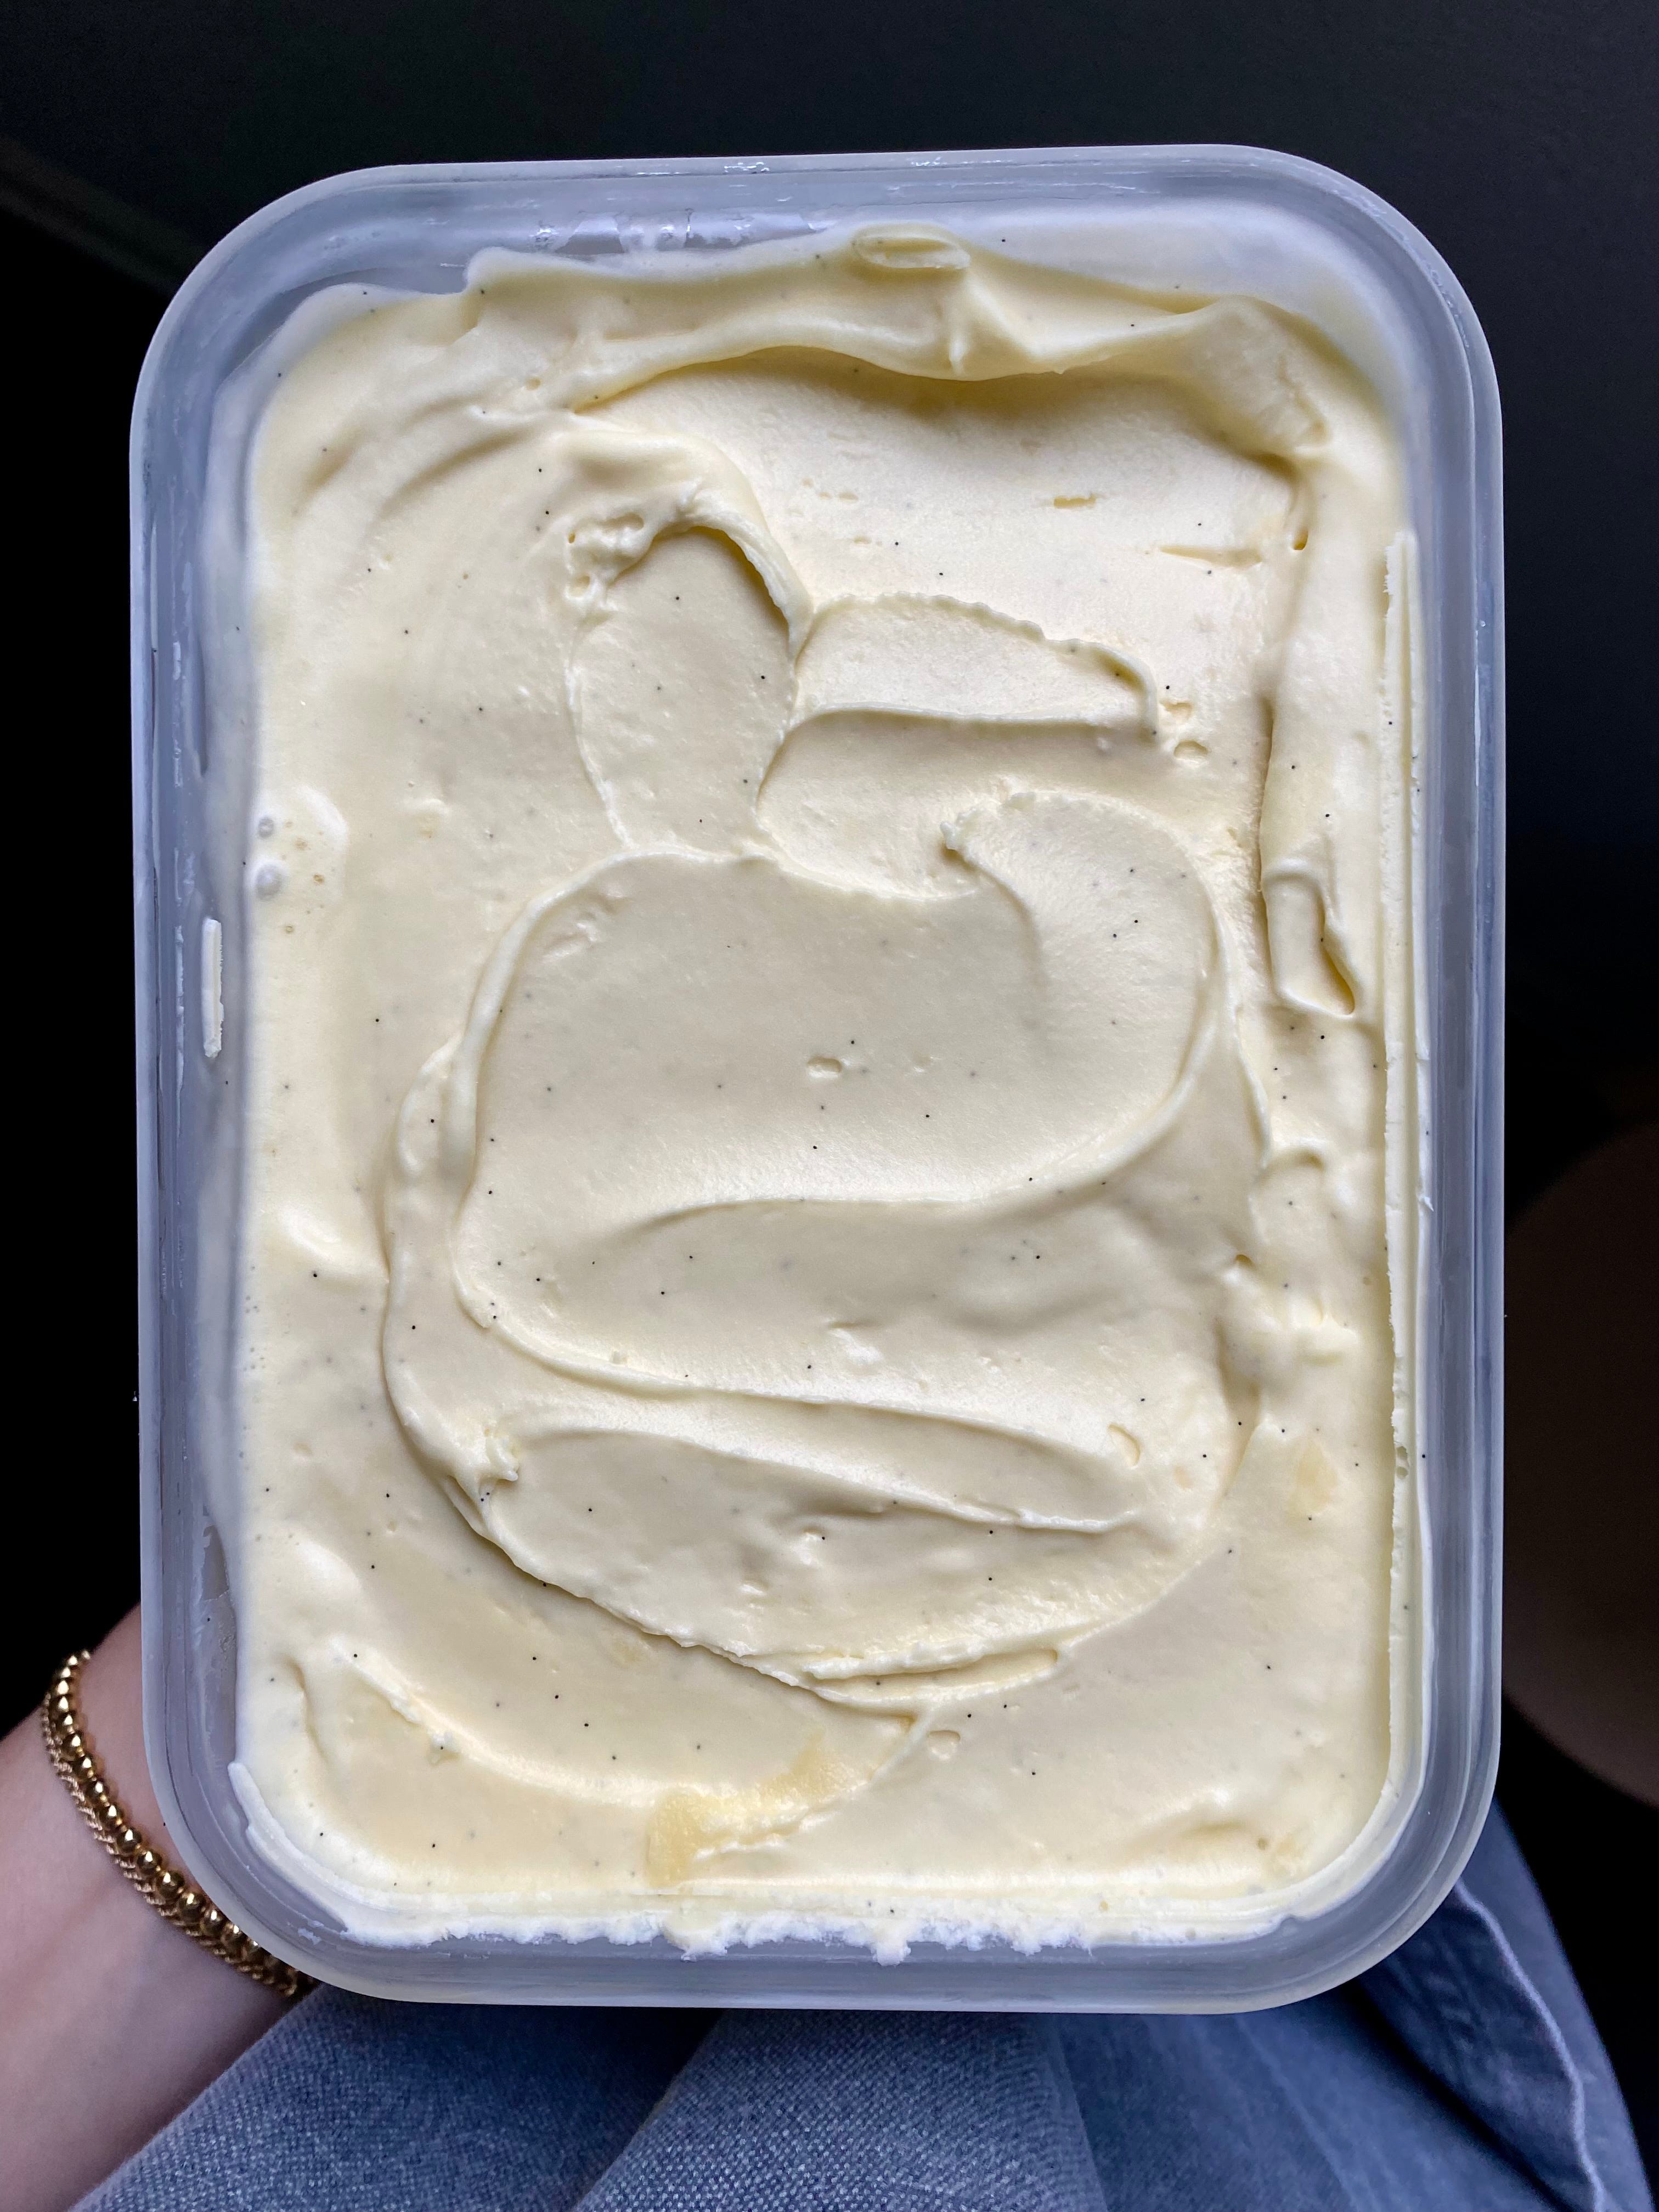
I received a few messages this week from people curious about ice cream having eggs in the base. There are a few different ways to make ice cream and last year I tested a bunch of different bases. My favorite ice cream base, hands down, is a crème anglaise base AKA a custard base. This is made by cooking milk, cream, sugar, and eggs until thick and silky. It’s rich and exactly what I like.
One way to get a creamy texture without eggs is to add xanthan gum and corn syrup like Salt & Straw does. You can find their recipe, here.
Corn starch is another additive to help thicken ice cream without eggs. Jeni’s Ice Cream base is made this way with the addition of cream cheese. Their recipe can be found, here.
Philadelphia-style ice cream is another no egg way to make ice cream. It is a little more delicate and gets its fat solely from the fat in the cream. When researching Philidelphia style recipes I found this one on Serious Eats that adds non-fat powdered milk for added creaminess. I was on to something!
The last no egg ice cream base option is a no-churn ice cream which is made by combining whipped cream and sweetened condensed milk. More on that, here.
So there are many ways to make ice cream, the choice is yours. Last year I found that bases without eggs lacked a specific richness that I really enjoy. I haven’t made any no-churn recipes though, they might be really great. Below is my go-to crème anglaise ice cream base, enjoy!
Crème Anglaise Ice Cream Base
2 cups Cream
1 cup Whole Milk
6 (sometimes 7) Egg yolks
150g Granulated sugar
1/2t Kosher Salt
*If steeping (vanilla bean, mint, tea, etc) start by warming the milk and cream just until it’s slowly simmering. Be cautious not to heat the milk on anything hotter than medium heat as it can scald the milk. Remove from the heat, add ingredients, cover, and steep for 30 minutes to 2 hours depending on the desired flavor. Then proceed with the following steps.
For this vanilla, I split one bean in half and let it steep for 30 minutes. After 30 minutes I scrapped the seeds and left the bean in for the rest of the process for extra steeping.
Prepare an ice bath before you begin by filling a medium-size bowl with ice and some water. Sit another bowl on top to start chilling. Get a strainer ready.
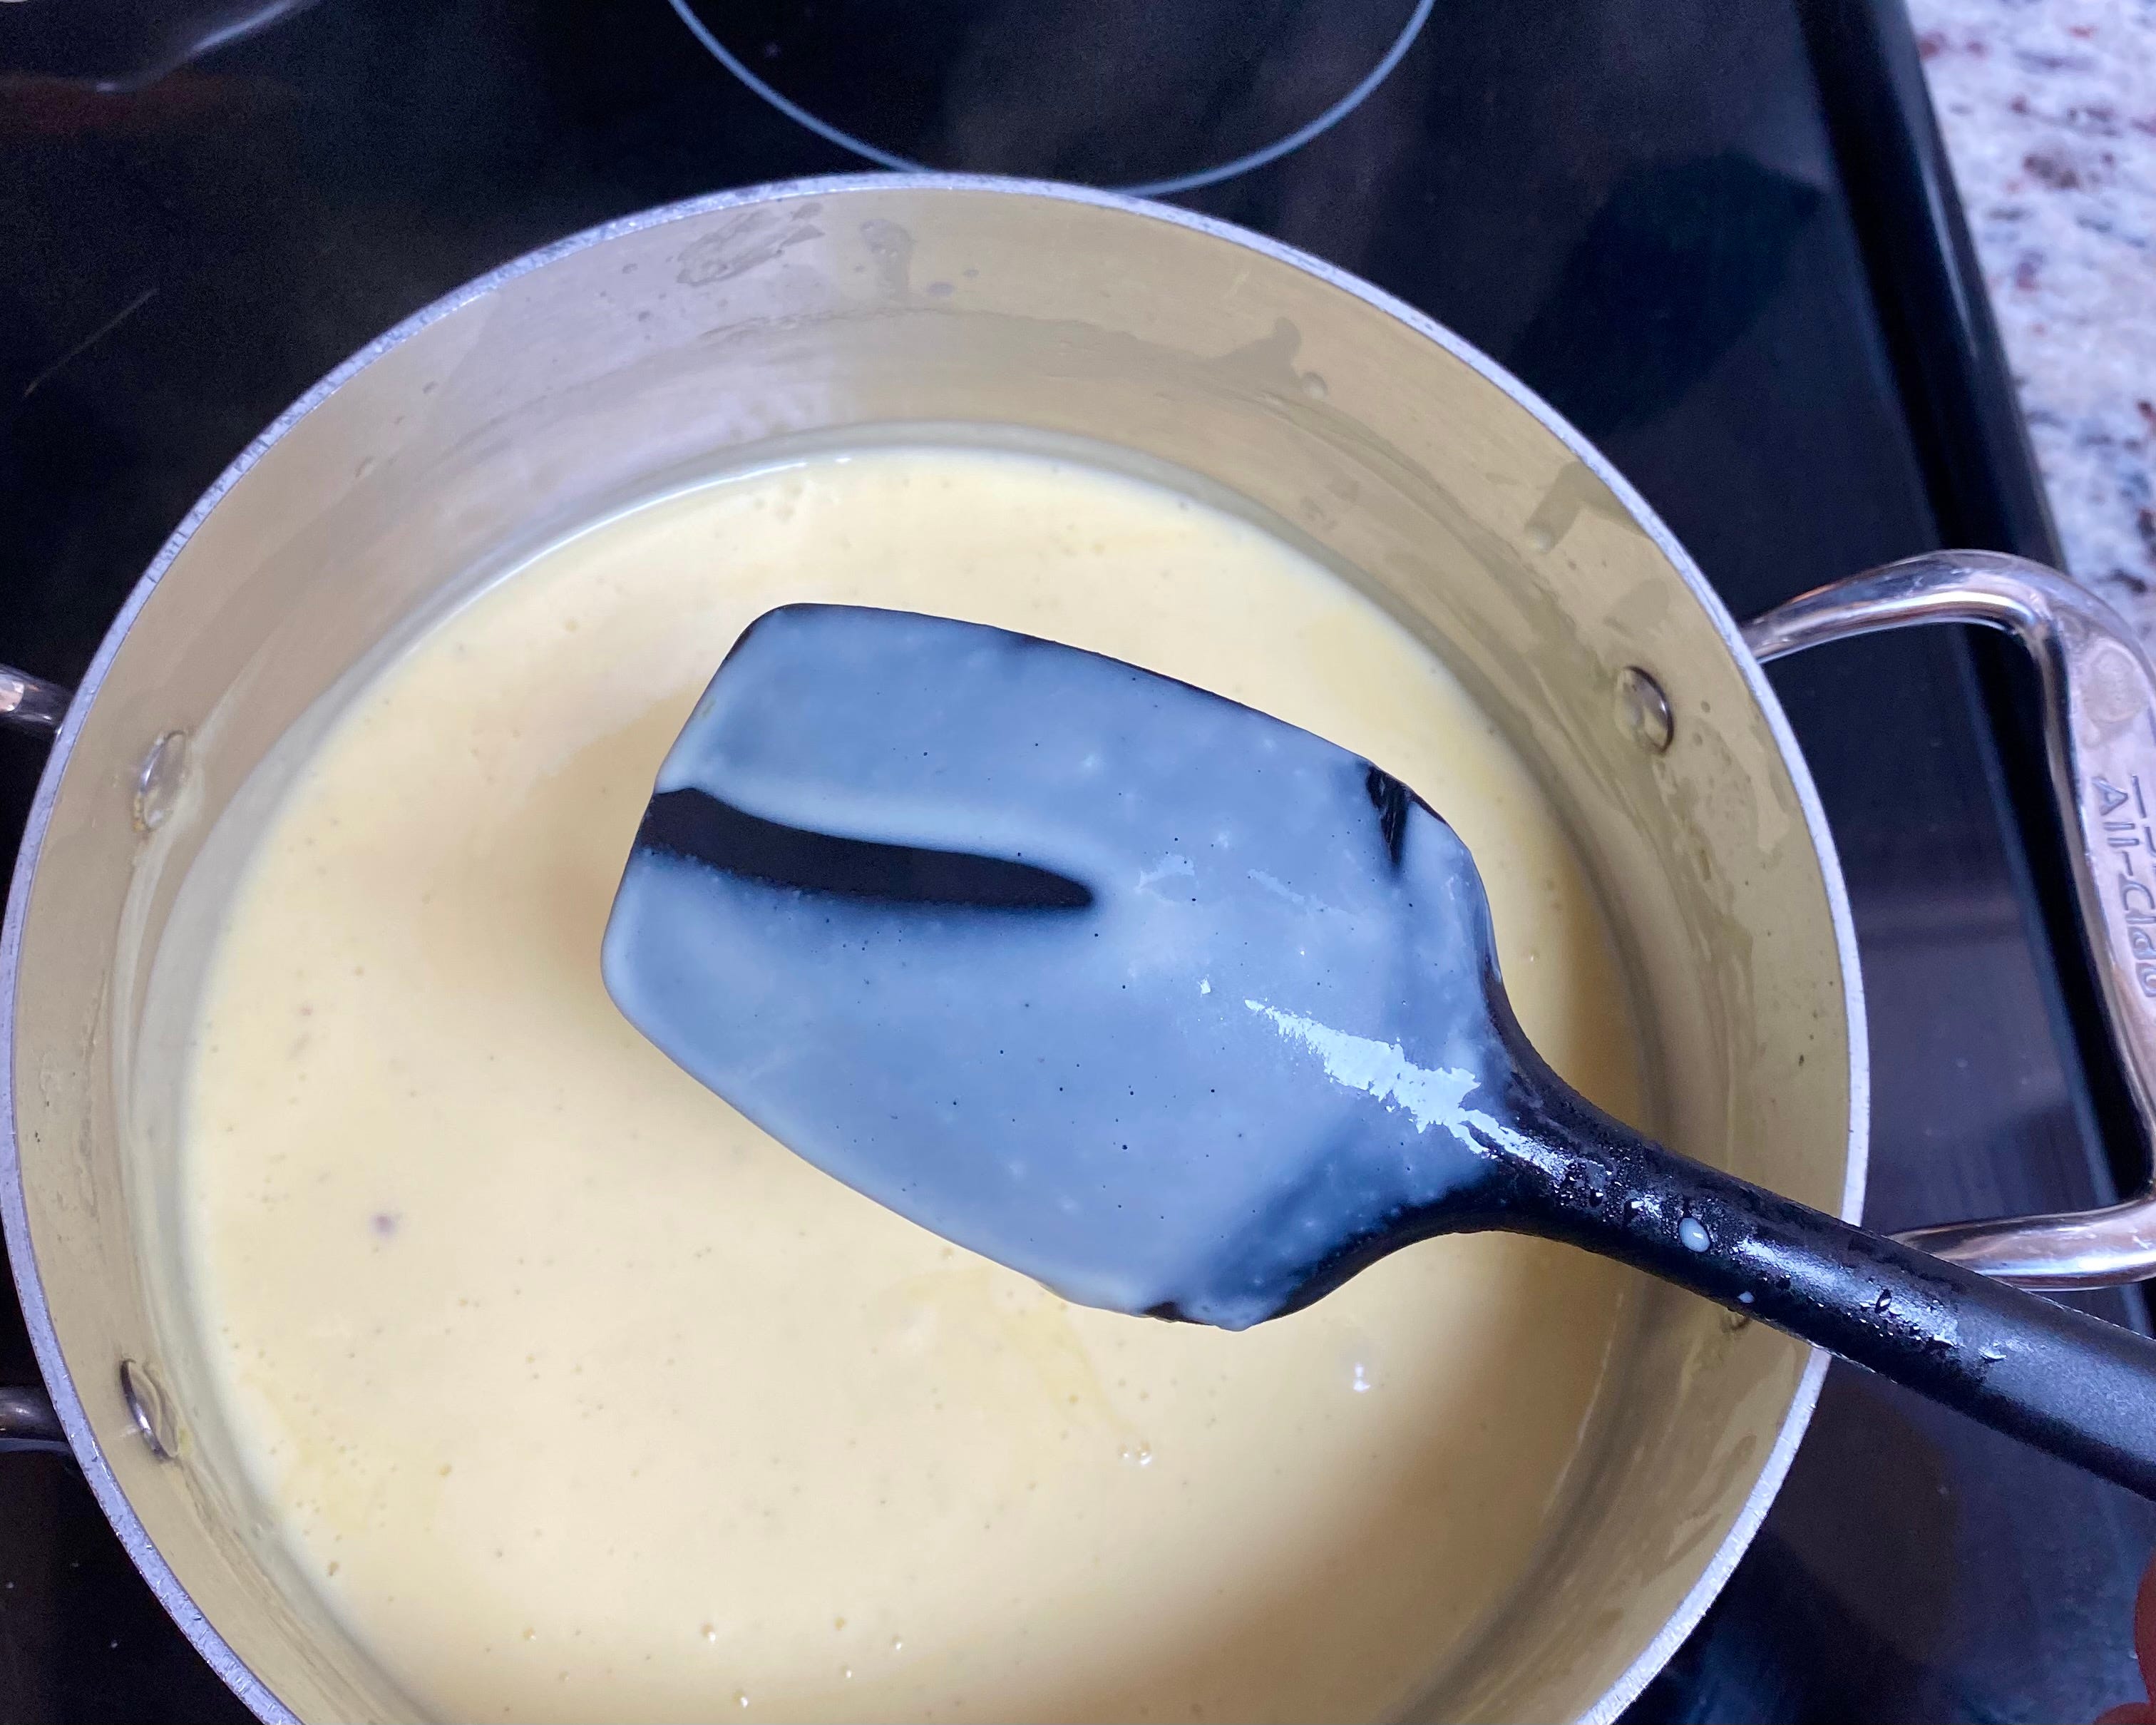
Whisk egg yolks together in another medium-sized bowl. Heat milk, cream, sugar, and salt over medium heat until just simmering. Give it a few stirs to help the sugar dissolve. Once simmering, turn the stove down to the lowest it will go. Then ladle warm milk into the eggs in a slow stream while continuously whisking the mixture. This is called tempering. We are bringing the eggs up to temperature slowly before adding them to hot milk to prevent curdling.
After two ladles of milk, slowly pour the eggs into the warm milk on the stove while continuing to whisk as they are being added. After all of the eggs are added, switch to a rubber spatula and continuously stir the mixture as it cooks over low heat. This doesn’t need to be aggressive stirring, just continuous and make sure to scrape the bottom.
The mixture is done when it is thick and “nappe.” Dip a spoon in and let the mixture coat the back. Run your finger through and make a line. If the mixture stays in place, it is done. This should take 8-10 minutes. Do not turn the heat up during this process!
Pour the crème anglaise through a strainer into the prepared ice bath. This will remove any small pieces of cooked egg or vanilla beans/ tea. *If steeping mint, strain before incorporating eggs and strain a second time to catch any pieces of egg.
Cool the mixture to 70 degrees over the ice bath and then transfer to a container and refrigerate overnight.
The next day, churn according to your ice cream maker’s instructions. I churn for about 15-20 minutes in my kitchen aid and increase the speed to 2/3 about halfway. Once churned I refrigerate for 6 hours until firm.

We went apple picking this weekend with my in-laws and the first thing I made was the tart above. Gluten-free crust, toasted almond and brown sugar frangipane, with loads of fresh apple slices. My vanilla ice cream with a slice of this…🤯.
Stuff to Read
I judge baked goods at the county fair. Here’s how you win Best in Show.
How New York’s restaurants suddenly got so expensive — and why that’s probably for the best.
On Milk, a little history of non-dairy milk, and whole milk’s return
Recipe Inspo
Lamb Keema Tacos *Made this Wednesday night
Watch This
Alison Roman is a hot dog lover too.
Thing Everybody Needs
If you already have a Kitchen Aid mixer, getting this attachment is a no-brainer. This is what I use and haven’t had any problems with it. It is a good place to start and see if you enjoy making ice cream before investing in an expensive machine.
Animal Cuteness
If you don’t strangle your cat while kissing them, do you even love them?


Before I leave you guys, I want you to know that Ina is a hot dog person too. That is all.
See you next week!! M