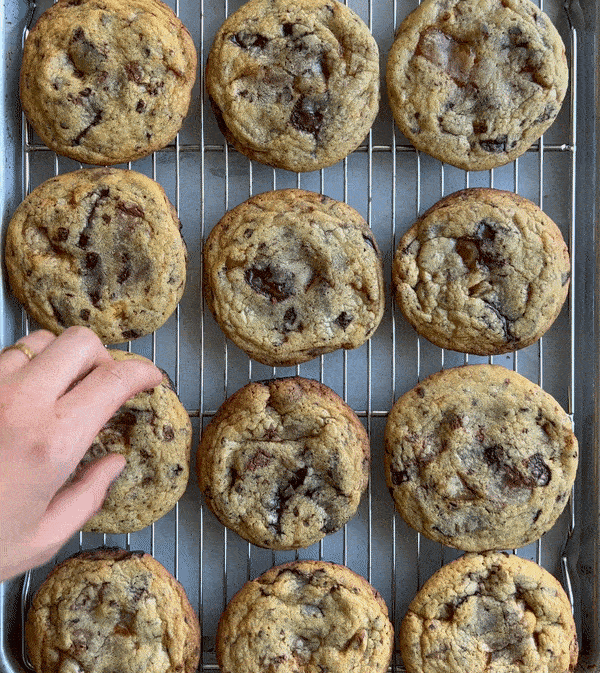
#73: Caramel & Chocolate Chunk Cookies
"Honestly one of the best cookies ever"


Welcome to Cooking Stuff. This is a place where I talk about all things food, cooking, and life. Recipes are back! Hit that button below to upgrade to a paid subscription so you don’t miss any. More of me, here. I’ll post a Reel making this recipe later today.

Today I’m sending you a recipe for Caramel & Chocolate Chunk Cookies. Every chocolate chip cookie out there is good but not every cookie is great. I am biased because this is my recipe but I think these cookies are really excellent. Don’t take my word for it, here are what some tasters had to say:

I’m going to get right to it…I already know what would stop you from making this recipe and it is the caramel. Yes, you have to make a dry caramel but I wouldn’t send it out into the world if I didn’t think everyone could do it! Let’s cover the caramel to break it down as well as some other important details for cookie success.
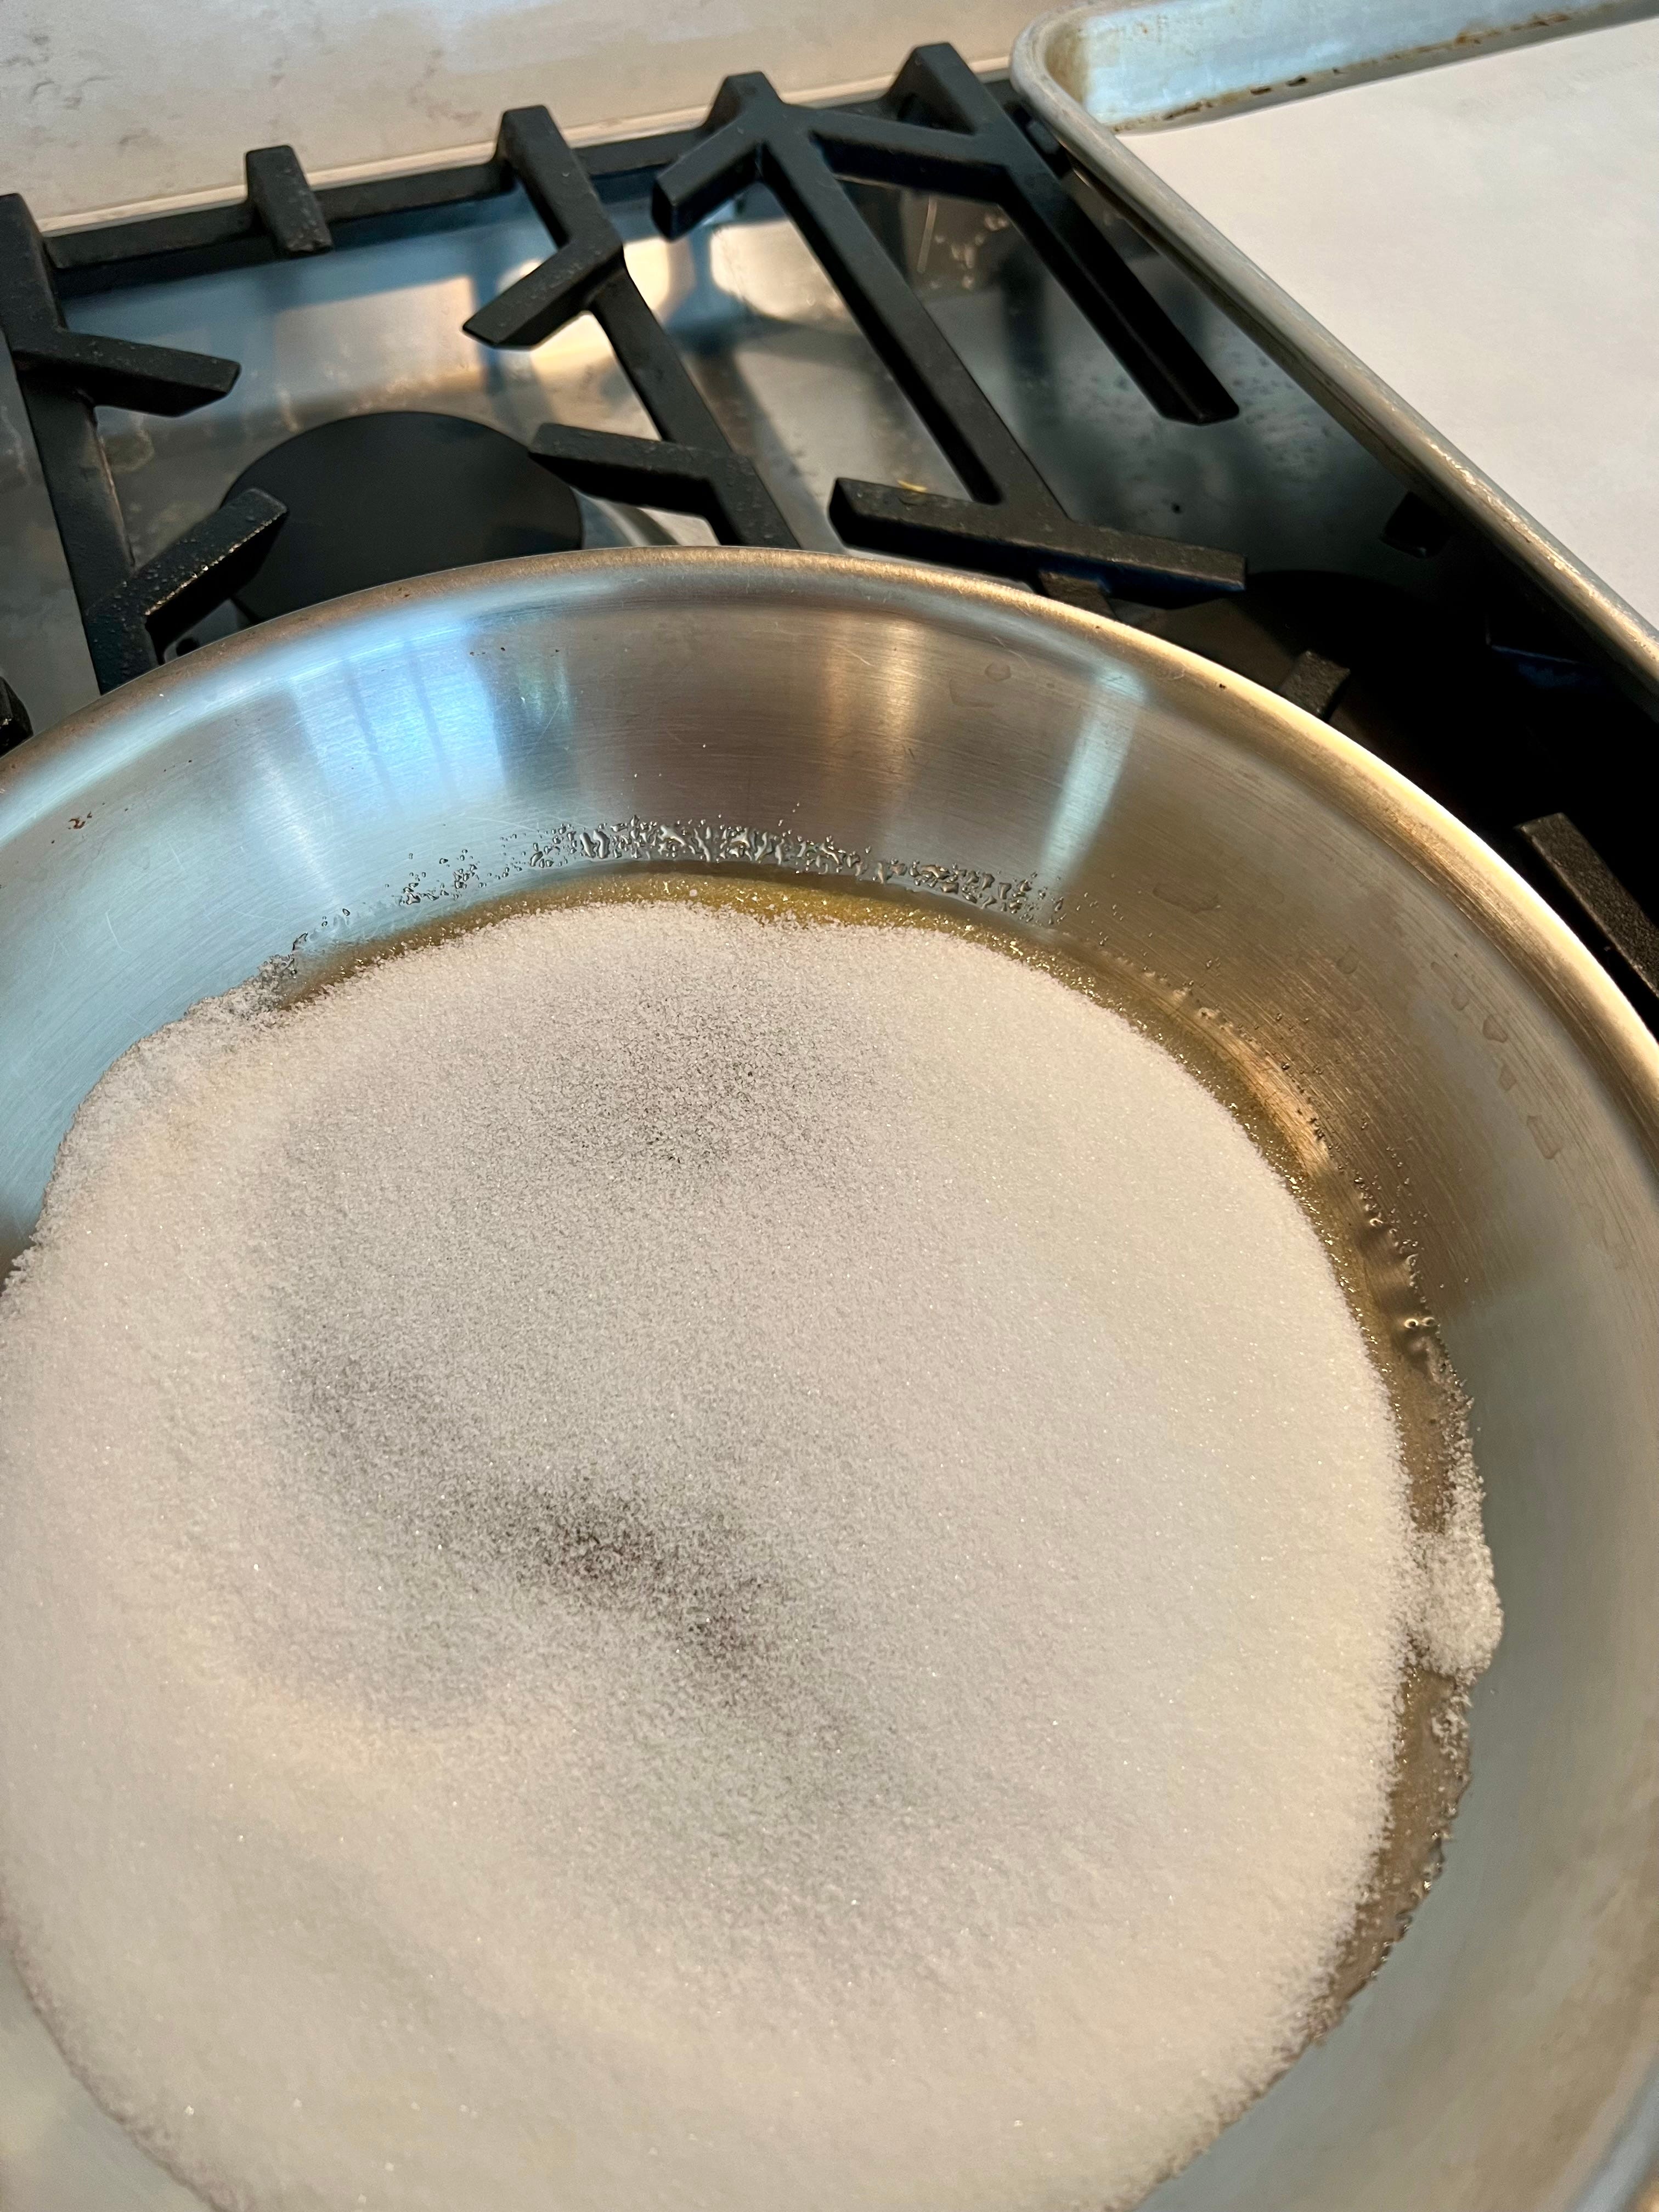
There are two ways to make caramel, wet and dry. The wet method dissolves the sugar in water, the water evaporates, and the sugar caramelizes. The dry method adds sugar to a dry pan. When heated the granules melt and caramelize. I lean toward the dry method more because it is fast and pretty hands-off.
You can use a skillet or a saucepan but make sure it is stainless steel. The sugar goes in and is placed over medium heat. Now you wait. There is nothing to do for about 8 minutes. Remember there are many factors that can speed up or slow down this process. Keep an eye on it the whole time and I will give you visual cues to look for. During this waiting period, I get out a heat-proof rubber spatula and line a sheet pan with parchment paper. If you have a silicon baking mat, now is a great time to use it. Not all rubber spatulas can withstand high temperatures and some will melt when placed in the hot caramel. If you don’t have a heat-proof one a metal whisk will work here too.
After about 8 minutes, you will notice the edges starting to melt down but the sugar hasn’t picked up any color yet. You will also see that the bottom layer of sugar granules is starting to melt too. This is when I give it a stir. From there it will look clumpy and cloudy, not yet completely melted, and maybe starting to look lightly golden.
At this point, I stir it every now and then. Stirring it doesn’t do anything to the caramel but it helps break some of the big clumps up. I like using a rubber spatula because there is less surface area for sugar to stick to during the process.

From here the sugar will darken quickly. Once everything is melted, completely translucent/no longer cloudy, it is done. The color should be a nice amber and you will smell a toasted aroma. Once you notice all of those things you need to get it out of the pan ASAP. Not just off the heat but out of the pan. Metal pans conduct heat and it will continue to darken as it sits in the pan leading it to burn. This whole process will take around 12-15 minutes.
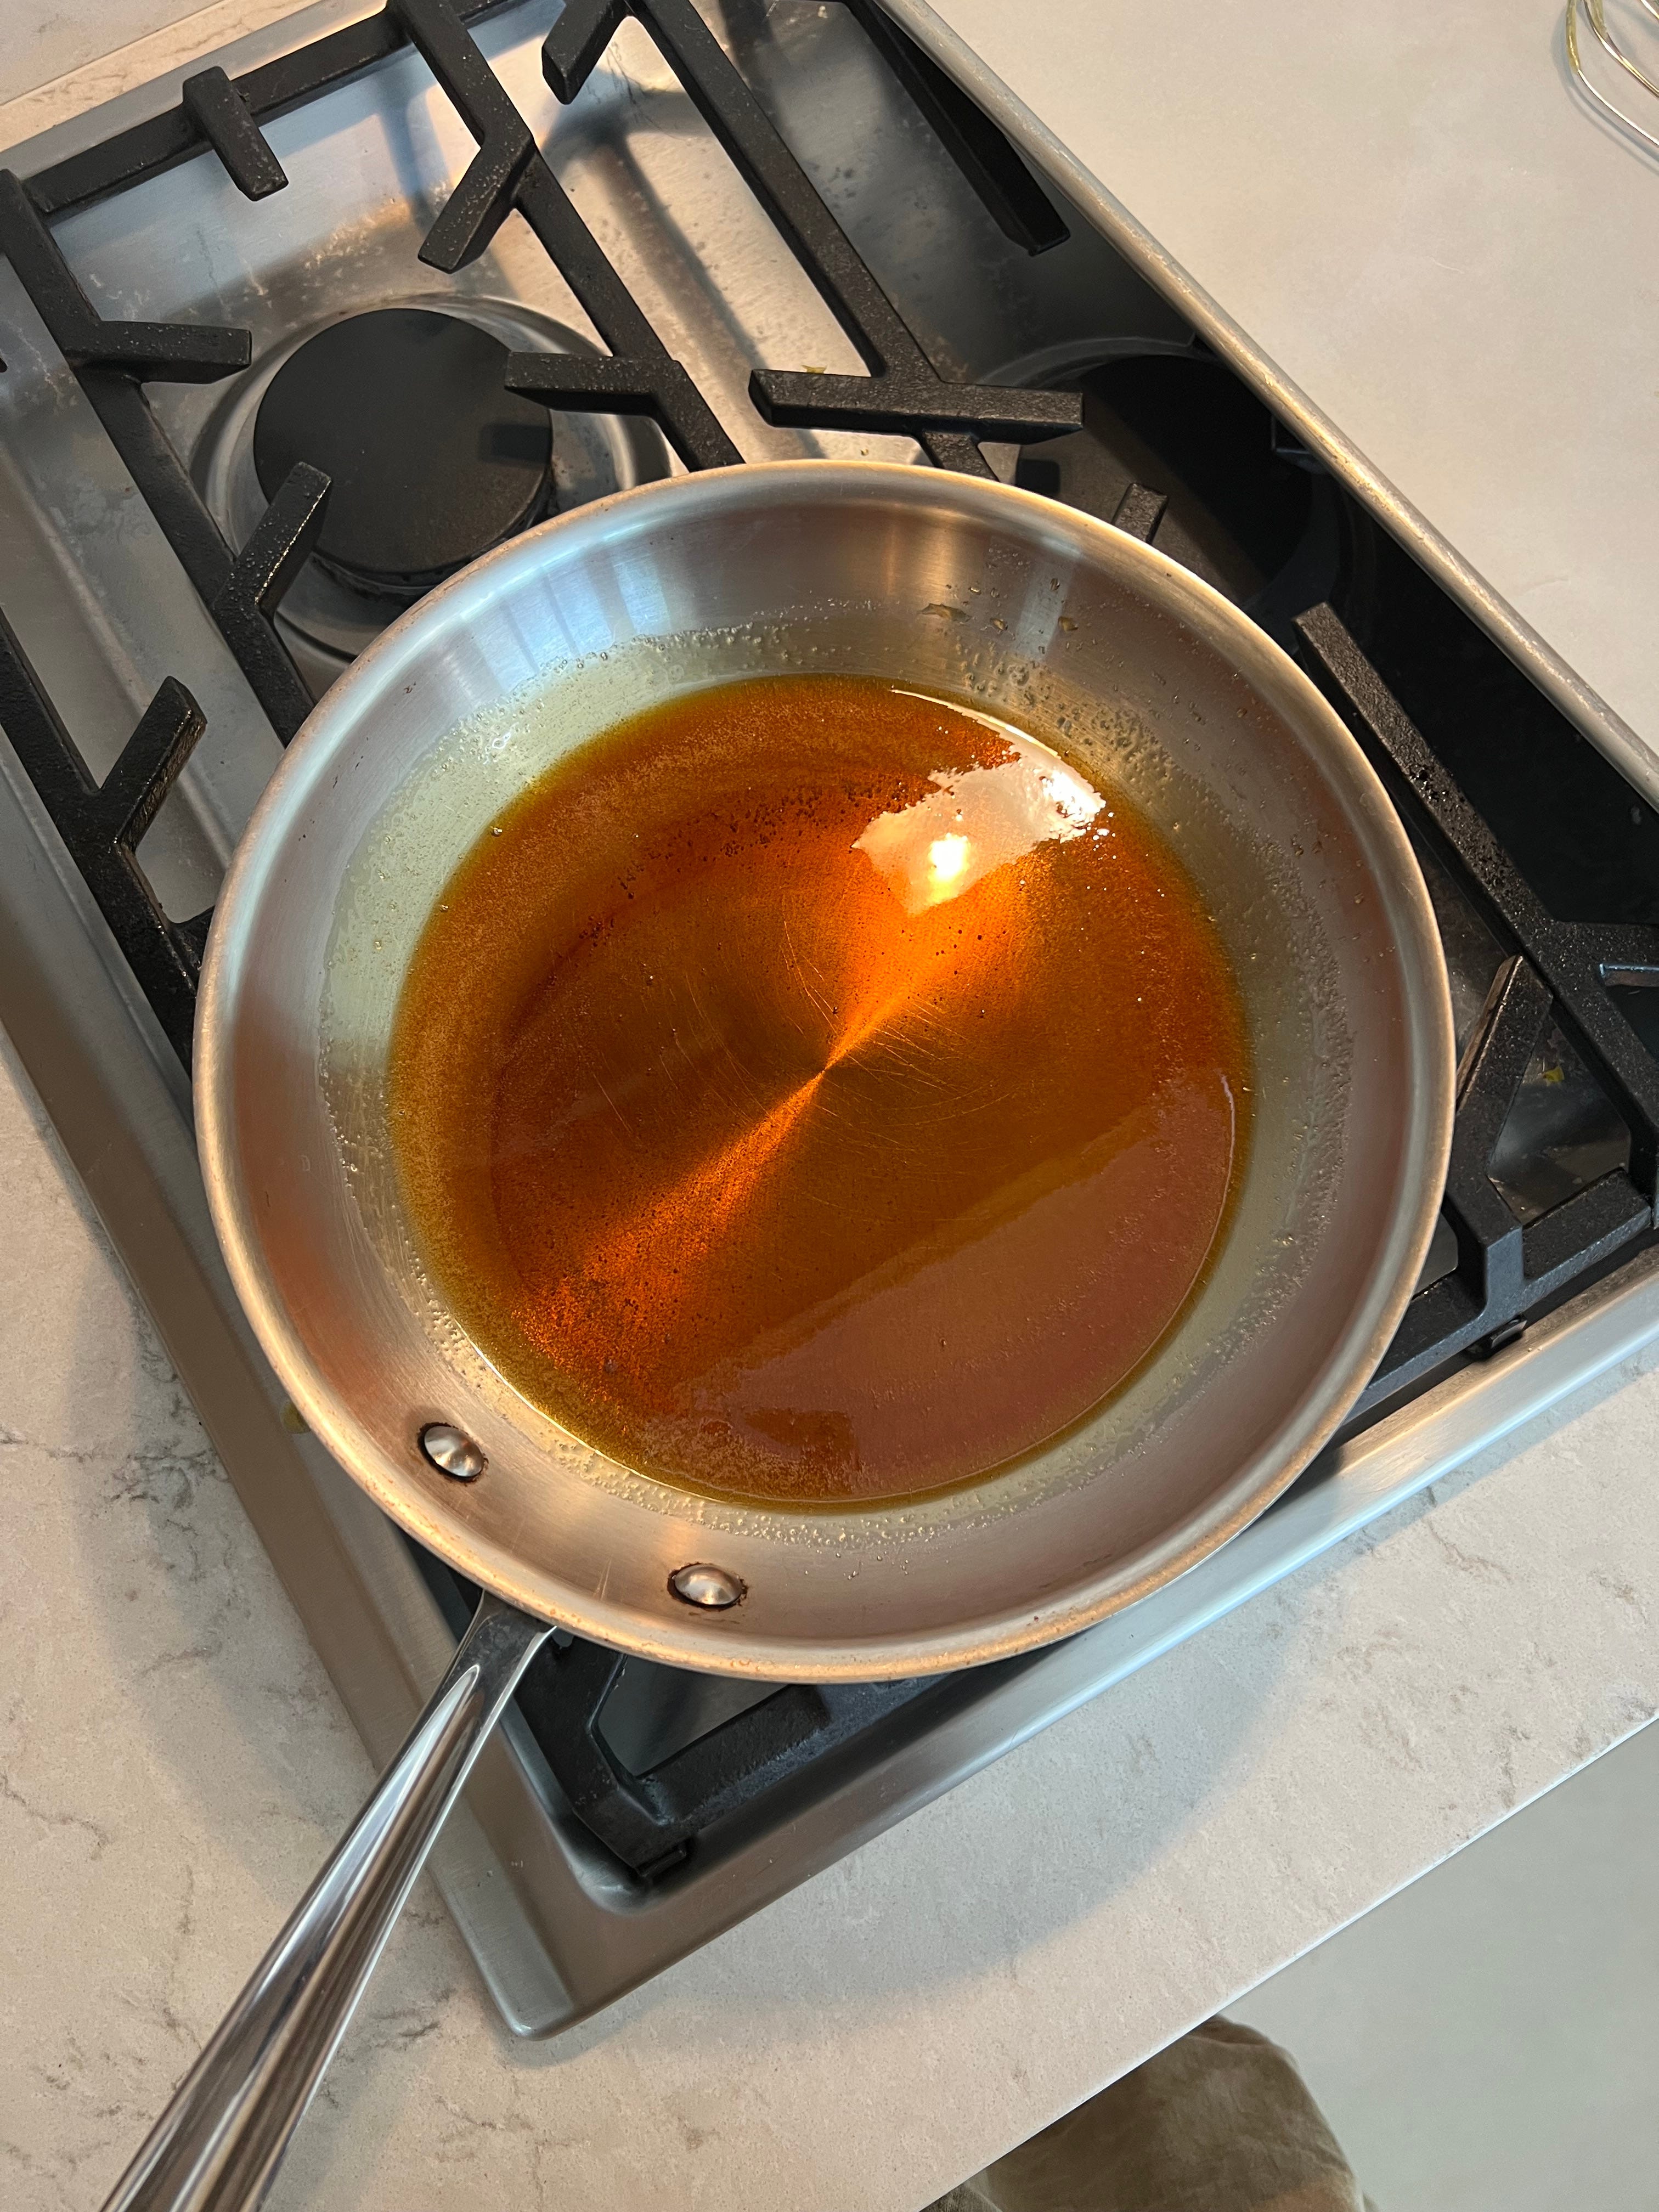
Pour it onto the parchment, or silicon pad, lined tray. Tilt the tray side to side to flatten and let it cool while you make the dough.
P.S. This caramel will be HOT and sugar burns are no joke. Please be extra careful not to get any on your hands.
From here I go directly into making my dough. Cream the butter and sugar, add the eggs, and mix in the dry–this is a classic cookie technique. When the dough is done the caramel will be completely hard. I like to take my chef's knife and gently wack it into small pieces of varying sizes. Those get mixed into the dough along with dark AND milk chocolate chunks.

I know, I don’t usually call for milk chocolate but I’m having a moment with it. I like the blend of both in these cookies. Some bites are a little bitter and rich and others are sweet and creamy. It’s the best of both words.
The dough gets pre-portioned and then chilled. It is really chunky and when I chilled it first I had a hard time scooping and shaping it. Plus the caramel absorbs moisture as it sits. Chilling these cookies for two hours is just enough to hydrate the dough and firm up the butter before the caramel starts to absorb moisture. If left overnight or frozen the hard caramel will comply melt out of the dough.
You might notice these cookies are bigger than I usually call for. 1.5 tablespoons is my usual cookie preference. These are 2 (heaping) tablespoons and I actually weighed them out to be 55g each. With a small cookie dough chefs treat left over. After you potion them, roll them between your palms to shape and pat the tops flat.
Chill, baked, and then…shape, again. These cookies will have big puddles of chocolate and caramel. We want puddles of caramel (!!) but sometimes they can ooze out the side. There is nothing wrong but it makes their shape a little wonky. The second they come out of the oven, while they are still malleable, I use a circle cookie cutter and scoot any caramel puddles back in place. This can be done with a cup or any other circular item. This is a little styling tip people use for perfectly round cookies.

See, not that bad?! It’s a little labor of love but a perfect weekend project. The end result is a chewy cookie with crisp edges, big puddles of chocolate throughout, and surprise crunches of caramel every now and then. It’s a pretty spectacular cookie experience, enjoy!