


#69: Flourless Hazelnut Chocolate Cake
New recipes coming at ya!


Welcome to Cooking Stuff. Recipes are back! These first few are available to everyone but hit that button below to upgrade to a paid subscription so you don’t miss future recipes.

Hello! It’s me with a recipe. Recipes are back and I’m having deja vu today. This is my first recipe since my break and the first recipe newsletter I ever sent was Salted Hazelnut Brownies, remember them? There is some weird chocolate hazelnut cosmic energy happening here.

Just like those brownies, today’s recipe is killer! It is chocolatey, unfussy, and just so happens to be gluten free. These are the best types of gluten free recipes because we are not trying to recreate gluten. They are already perfect as they are…and they just so happen to not include gluten. Anyways, I’m not here to focus on the lack of gluten (that’s just a bonus), I’m here to tell you how delicious and easy this cake is to make.
There are three main steps to this recipe and if you do them in order things should flow very nicely and you will have a cake in 90 minutes. I’ll break it down for you:
Step one: toast, peel, and grind hazelnuts
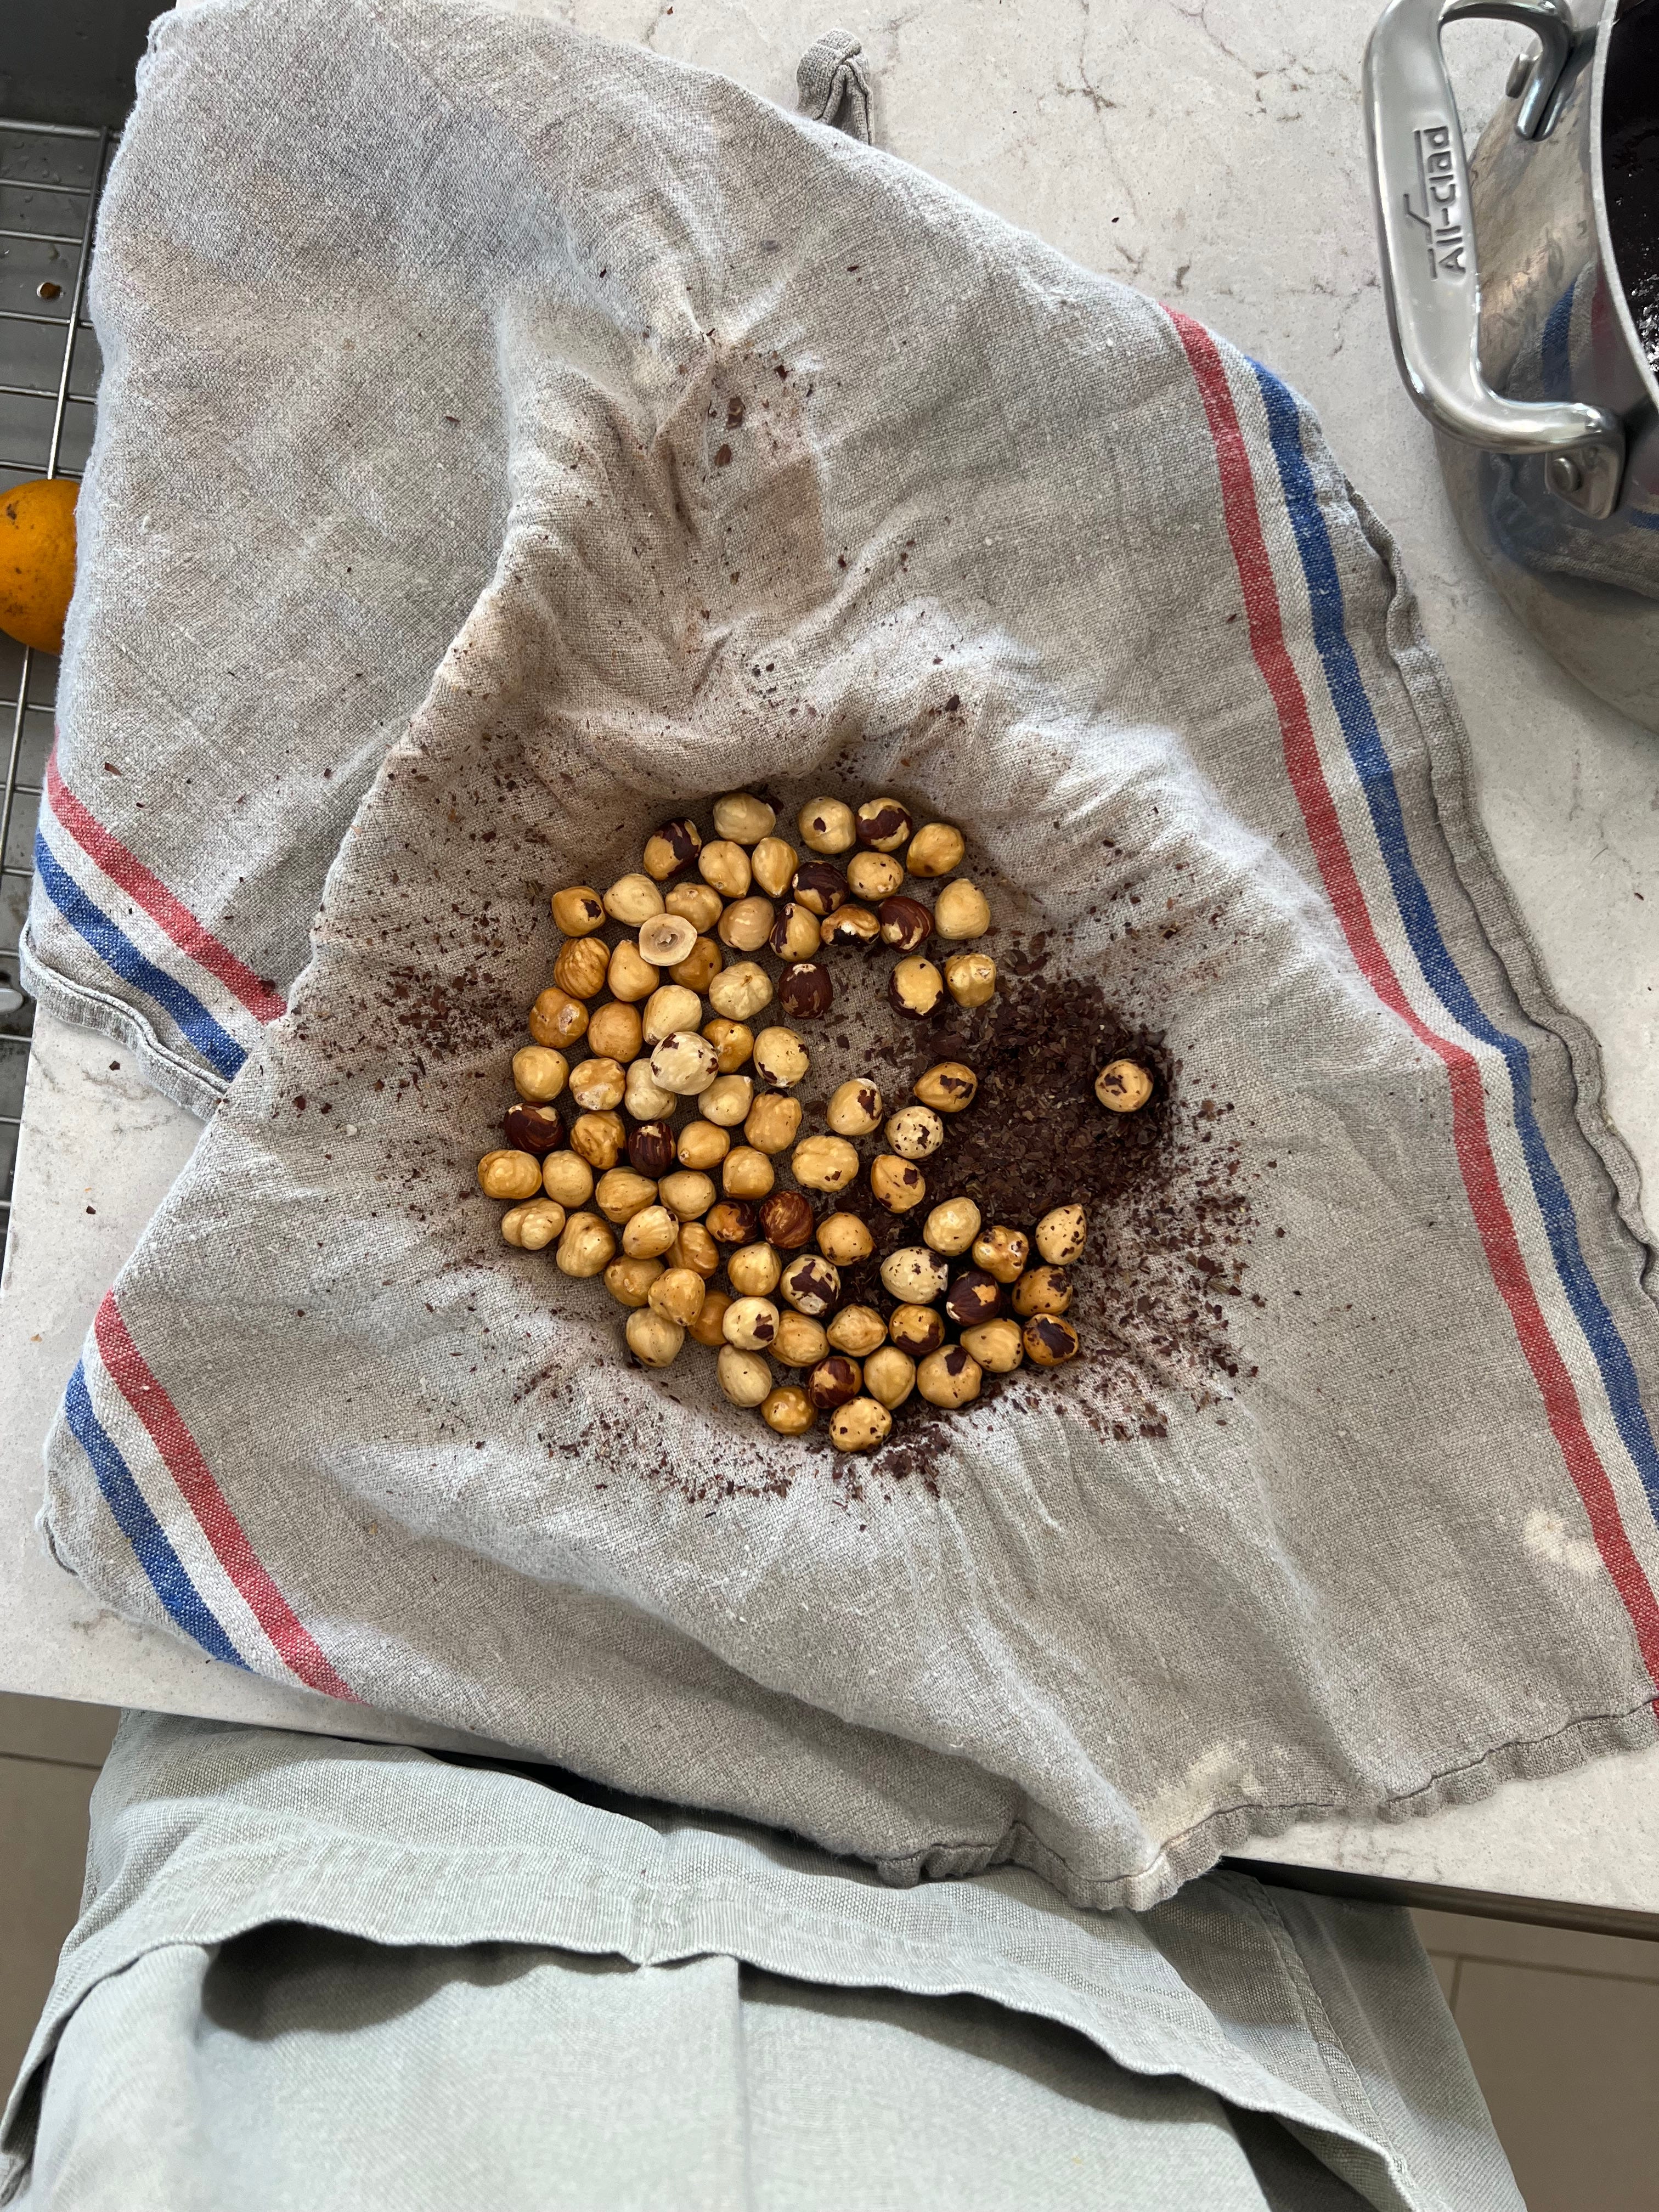
Okay, this is slightly fussy but really not too bad. Hazelnuts have a dark brown skin on them. There is nothing wrong with the skin except that it tastes bitter. If you leave the skins on they can sometimes make your desserts bitter tasting too. It’s best to remove them and the easiest way to do this is by toasting them. Lucky for us, toasting the nuts also adds a toasty flavor.
Pop the nuts in a 300º oven for 20 minutes. When you pull them out you will be able to see the skins already peeling off. Transfer the hot nuts to a clean dish towel (one you don’t mind if it gets stained) and rub the nuts together. The skins will rub right off and you are good to go. You can spend forever getting every last fleck of skin off but there is no need to stress about a few stubborn pieces.
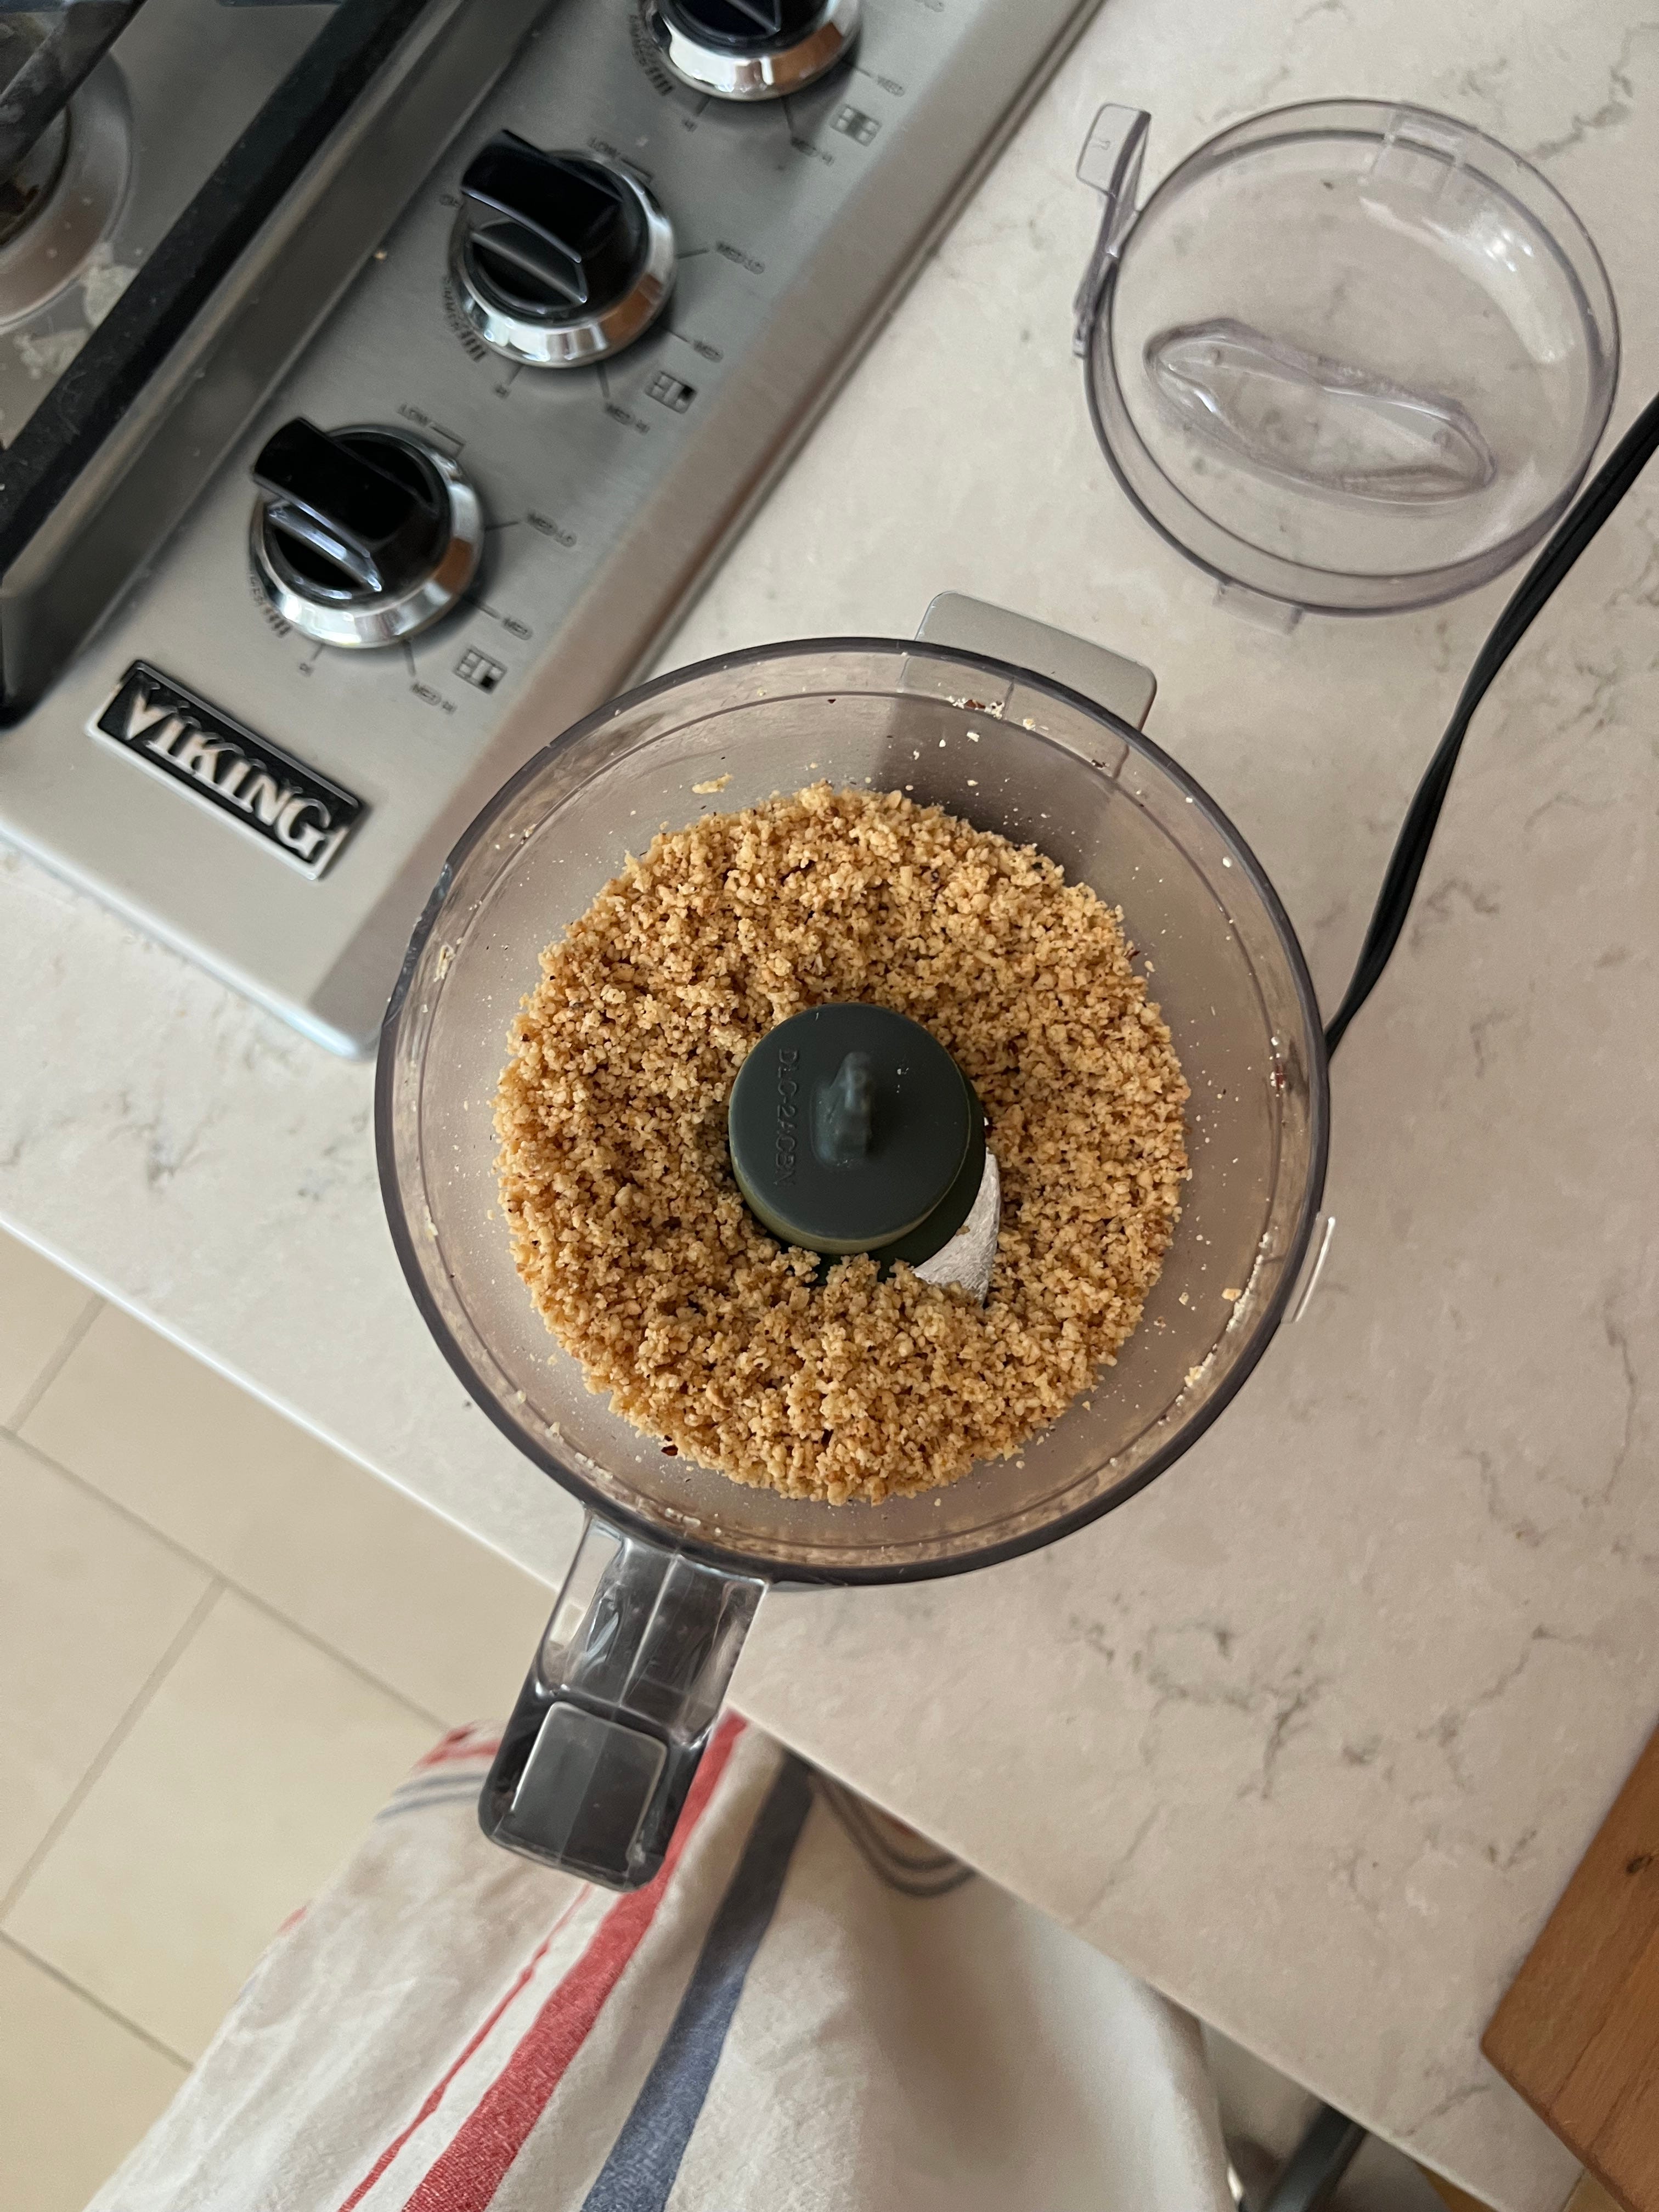
Those nuts go into a food processor and are ground to a sandy consistency.
Could you swap hazelnuts for any other nut of your choosing? Yep. Could you buy a bag of say almond flour at the store and skip this step altogether? Yep, you sure can.
Step two: melt the chocolate
The technical and traditional way to melt chocolate is with a double boiler. This gently heats the chocolate with steam and prevents scorching but I said unfussy so we are going to melt our chocolate directly on the stove. In a pan over the lowest heat possible, warm the chocolate and butter with the vanilla extract, rum, and orange zest. Stir often with a rubber spatula and as soon as it is melted pull it off the stove to cool a bit. If you use low heat, stir often, and pull it off as soon as it is melted – your chocolate will be fine. I promise.

Vanilla, rum, and orange zest all add layers of flavor. If you don’t have one, skip it. Orange goes well with chocolate but lemon, not so much. That wouldn’t be a great swap here.
This mixture needs to cool slightly before we use it. Leave it on the counter while you do step three and it will be ready to go.
Step three: whip the eggs
When you look up the definition of whip this is what you get:

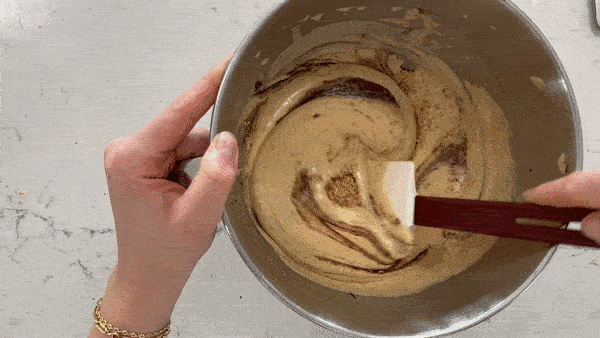
In this final step, we need to whip as much air into the eggs and sugar as possible, the technical term is “ribbon stage.” You’ll need a whisk. Whisking by hand will cause your arm to fall off. Grab a stand or hand mixer with a whisk attachment.
After about three minutes on high, the eggs and sugar will look foamy. They won’t hold any peaks but they will have almost tripled in volume and look aerated. The volume that we get from whipping the eggs and sugar together gives the cake volume and structure in place of flour.

Now you put it all together and bake. The cooled chocolate gets folded into the whipped eggs, followed by the hazelnuts. We just spent three minutes putting air into the eggs it’s important to be gentle while you fold to prevent them from deflating. Over mixing will cause this cake to be flat.
Scrape the spatula along the bottom and gently fold the batter over itself. Repeat until things are no longer streaky but don’t be too perfect about this.
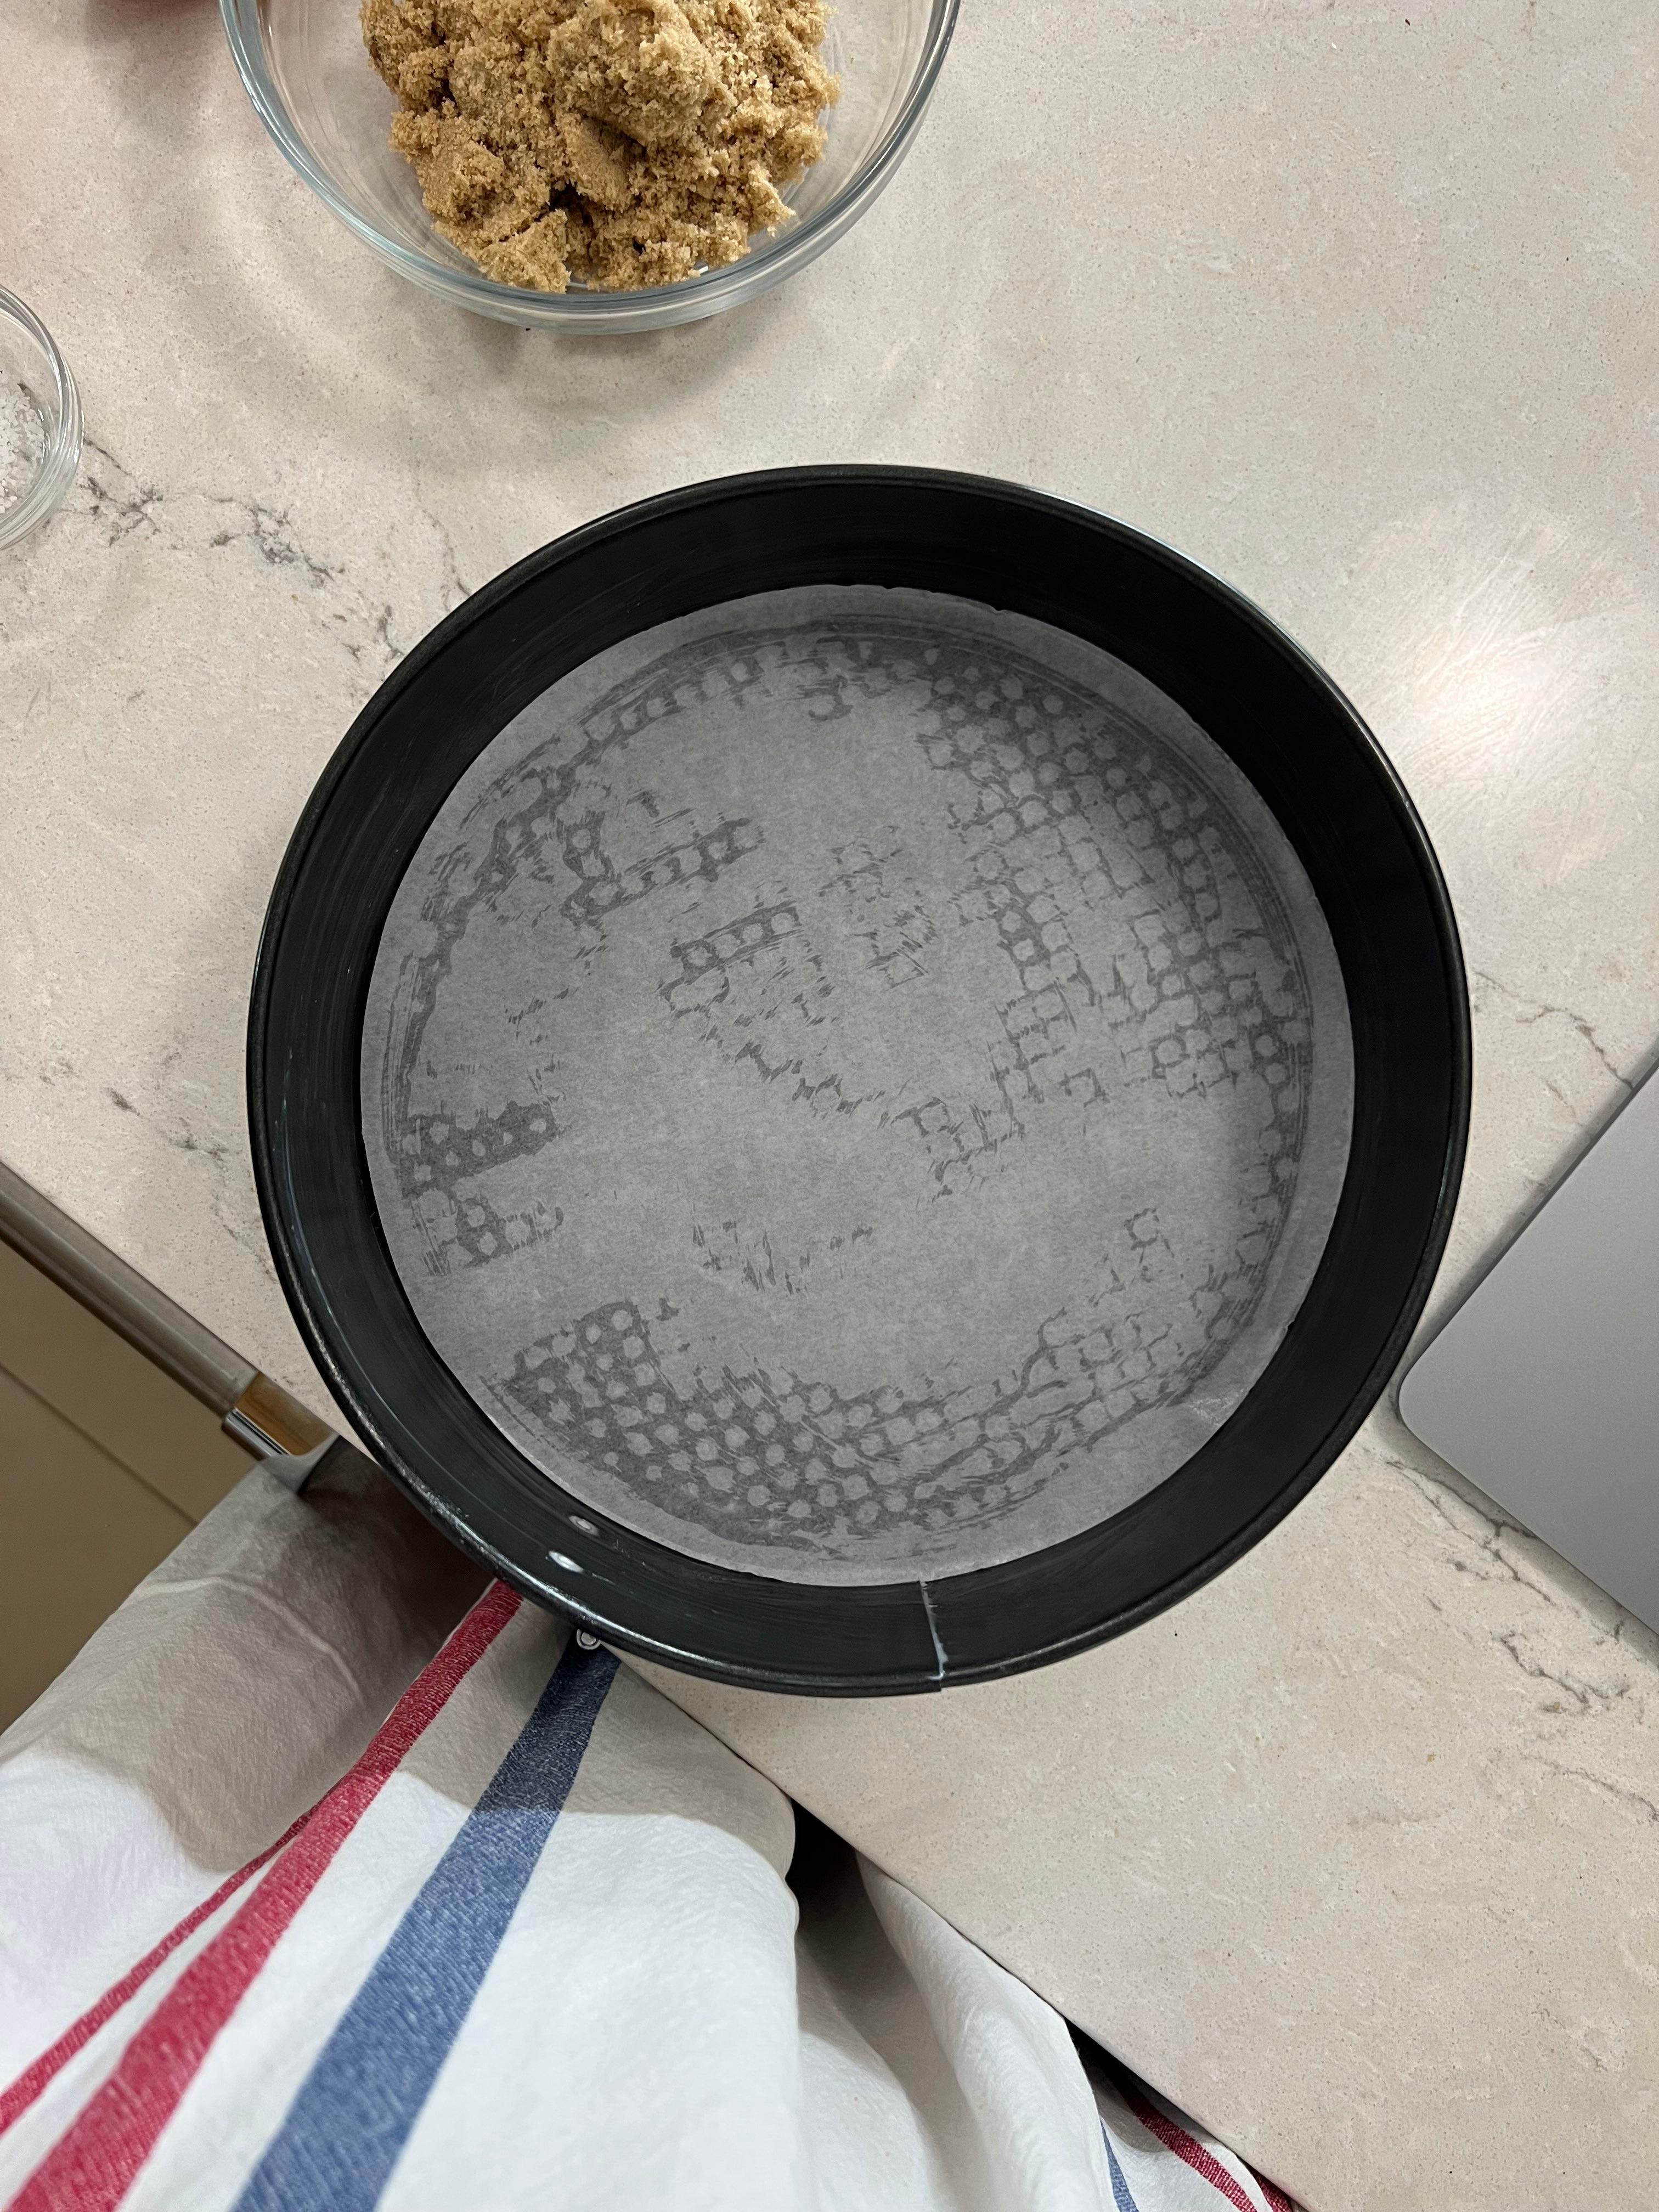
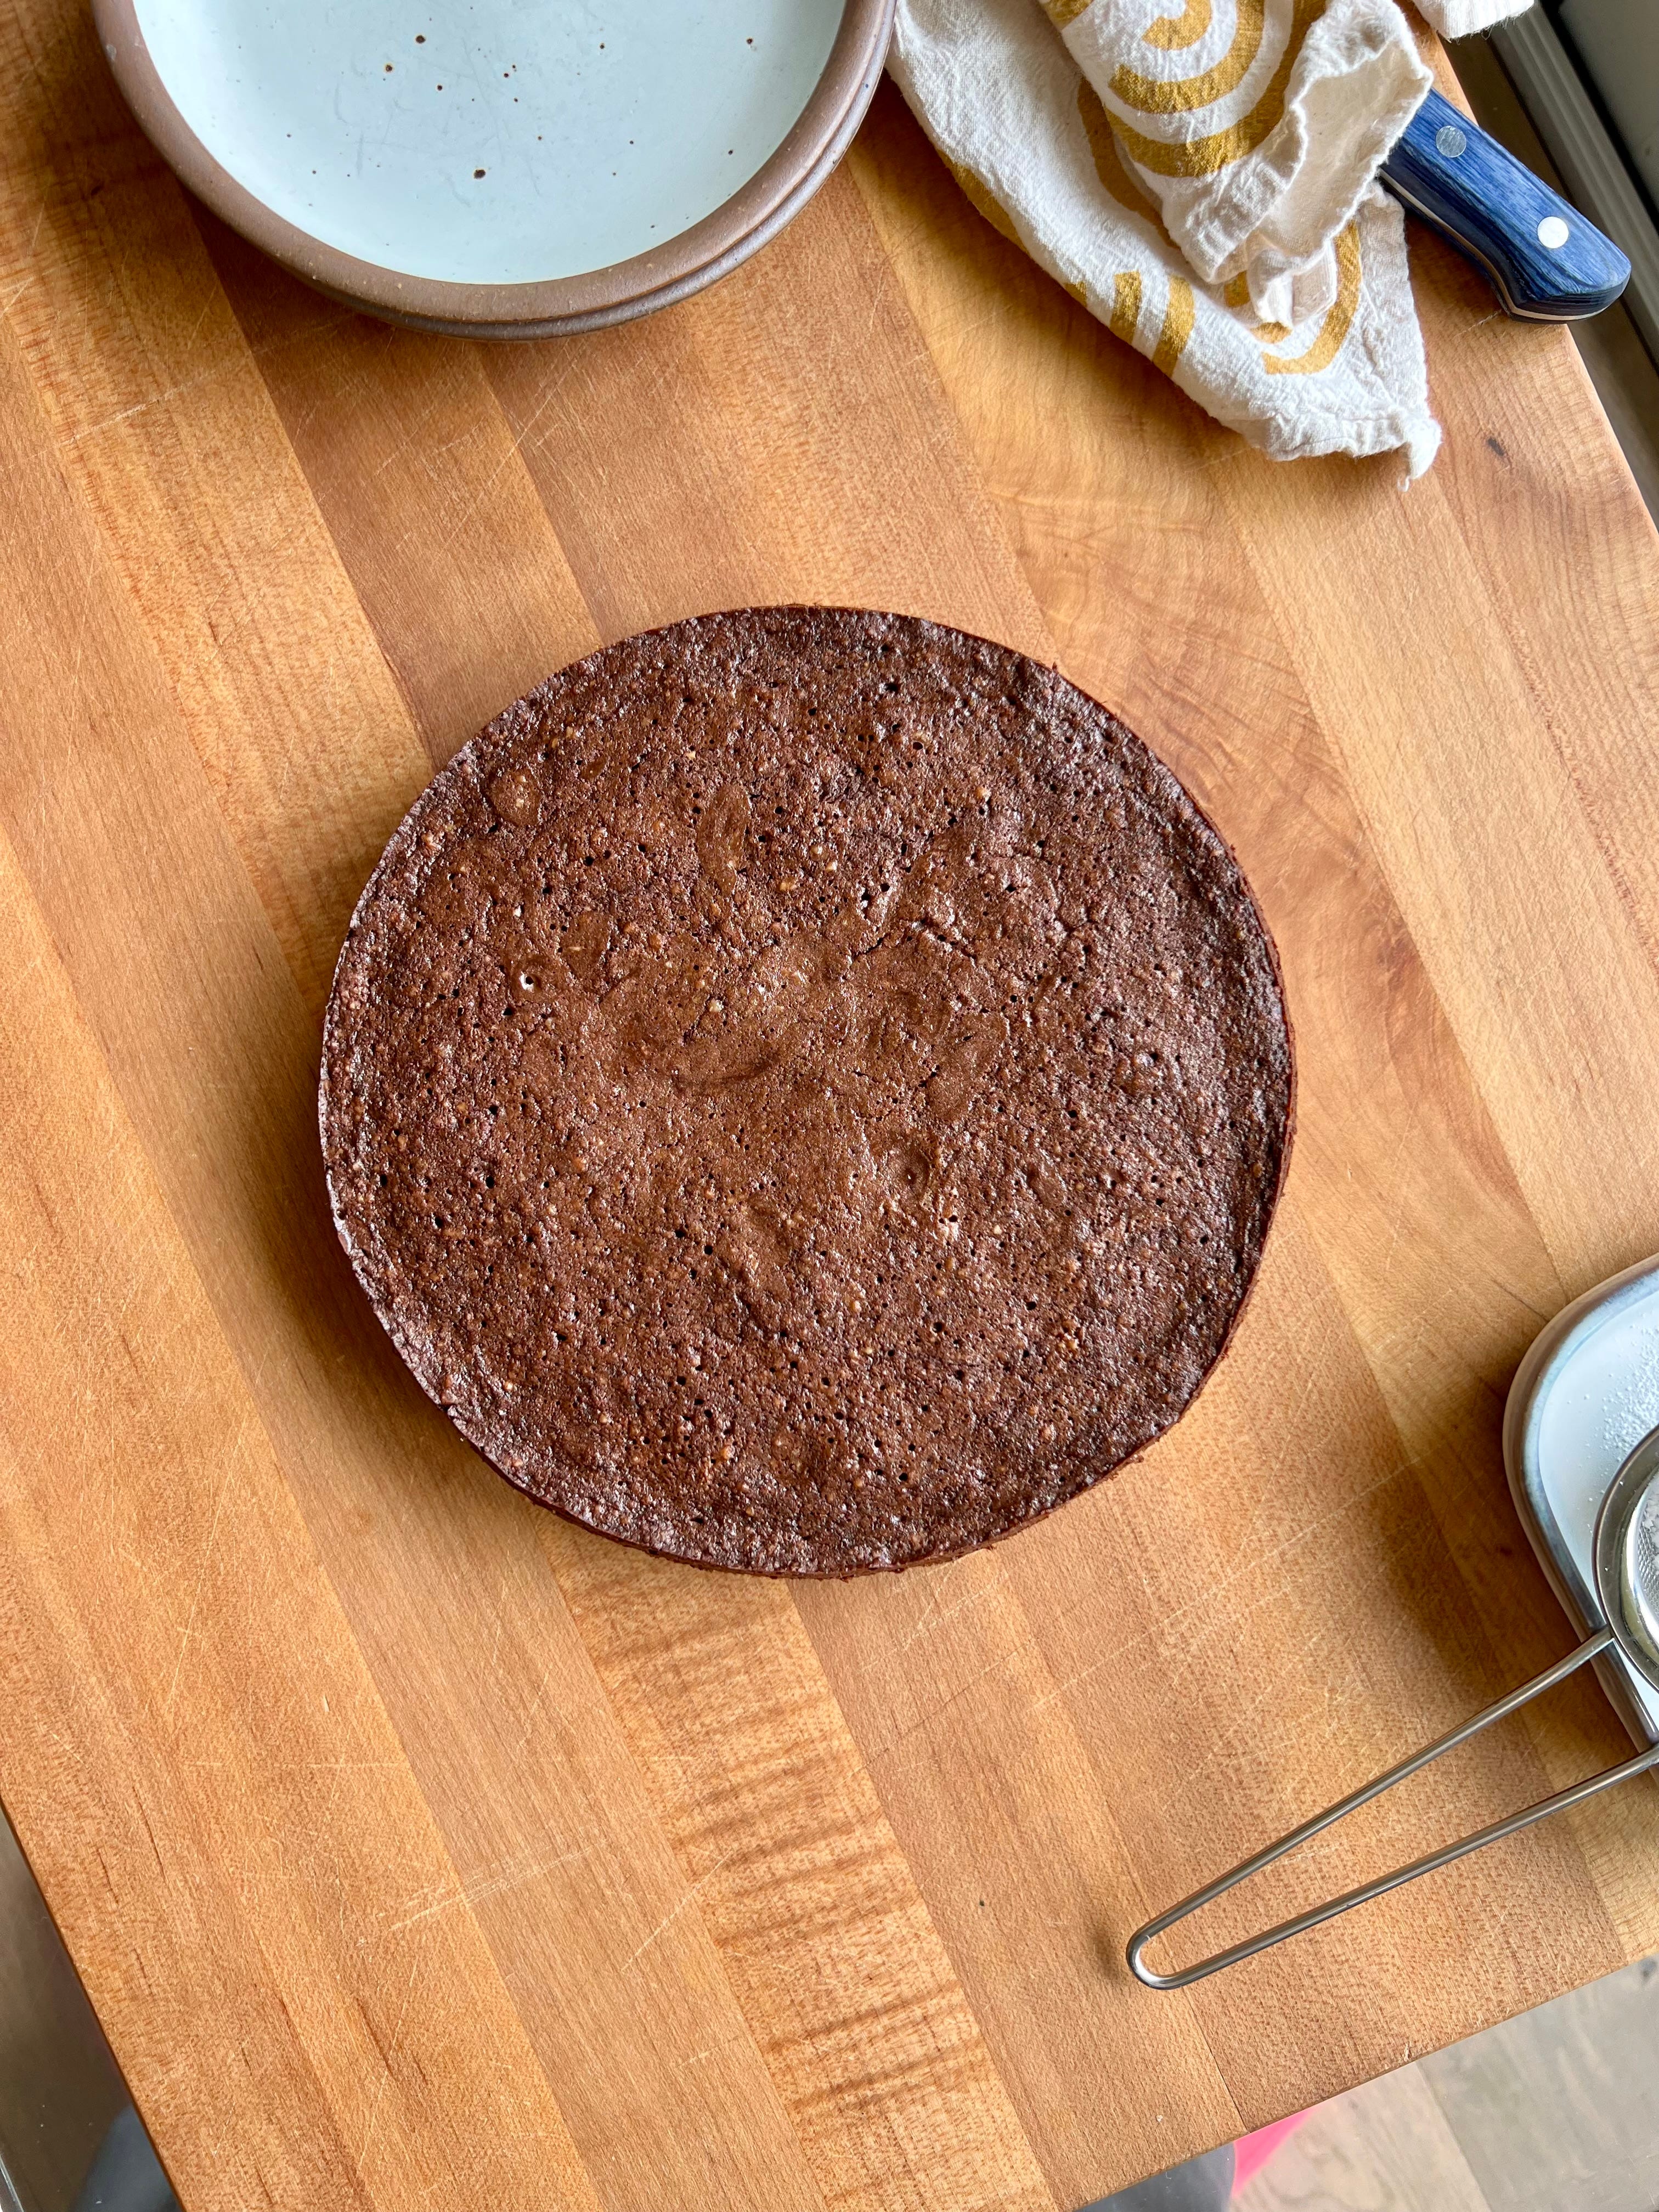
Immediately pour the batter into your prepared pan and get that cake in the oven. What pan you ask? I debated whether or not a springform pan was necessary but it really is. This cake will crumble if overly handled or aggressively pulled out of a pan. A buttered springform pan lets us slide the cake out in one beautiful piece. Lining the bottom with parchment allows you to remove the metal bottom for serving easily but that’s optional.
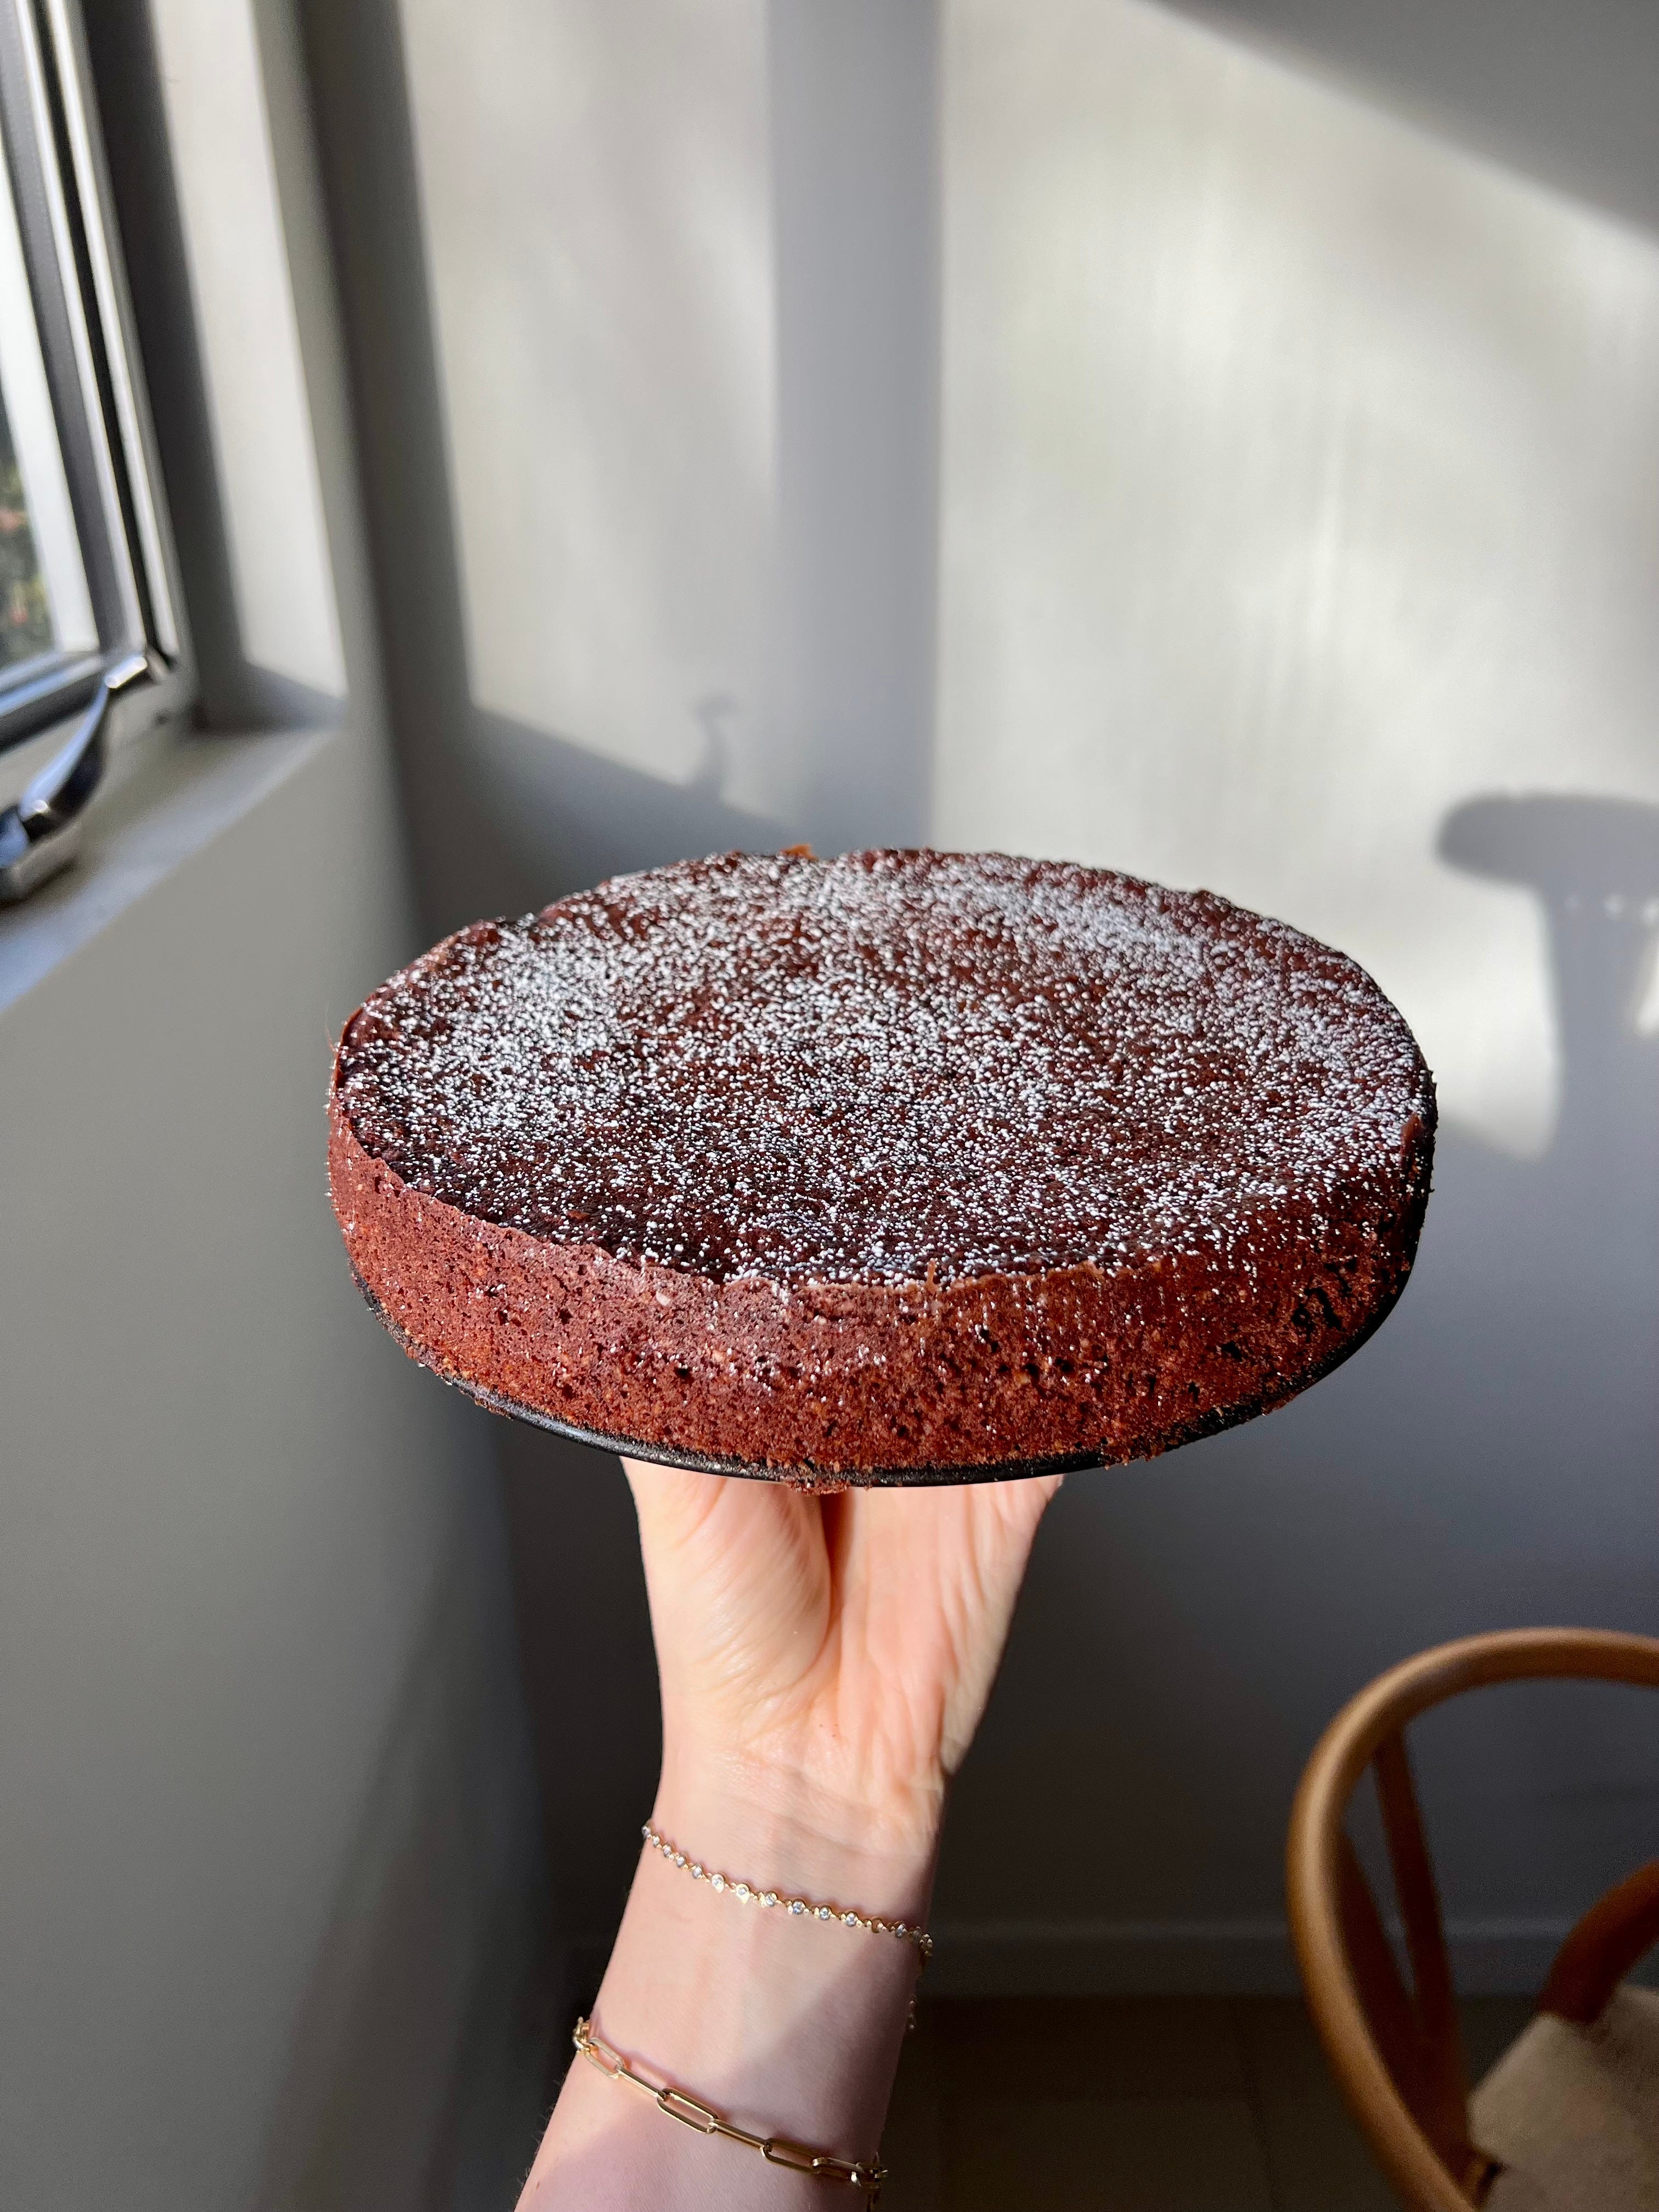
45 minutes later you will have cake! It’s shorter than a “normal” cake but that’s just how she is. The center will dome a bit and then fall as she cools. The edges will pull away slightly. No need to test the center for doneness because a toothpick will come out gooey. Let her cool in the pan until she is no longer hot and then pop her out. Dust her with powdered sugar or cocoa powder. She’s enough on her own but excellent with whipped cream or ice cream. OH, and she is perfect for Passover. Enjoy!

Flourless Hazelnut Chocolate Cake
One 8-inch cake • 90 minutes
95g whole raw hazelnuts
130g 70% chocolate, chopped or broken into chunks
85g butter
9g vanilla extract
26g rum
1 orange zested
3g Morton’s Kosher Salt
100g light brown sugar
3 large eggs
Butter an 8-inch spring-form pan
Optional, line the bottom with parchment paper
Heat an oven to 300º
1. Place hazelnuts on a sheet tray and bake for 20 minutes. They will toast and the skins will loosen. Transfer the hot hazelnuts to a clean dish towel and use the towel to rub the nuts together. After a few minutes of rubbing, the skins should be removed. It is okay if a few are still stuck on.
2. Transfer toasted skinless nuts to a food processor and grind until the consistency of coarse sand.
3. In a small pan over low heat, warm butter, chocolate, vanilla, rum, and orange zest until the butter and chocolate are completely melted. Stir with a rubber spatula often. Immediately remove the pan from the stove and let the mixture cool on the counter.
4. In a bowl whip the salt, brown sugar, and eggs. This can be done in a stand mixer with a whisk attachment or with a hand mixer with a whisk attachment. Whip until the mixture is aerated, light in color, and tripled in volume. It will not hold any sort of peaks but will look foamy. About 2-3 minutes on high with a stand or hand mixer.
5. Use a rubber spatula to fold the chocolate mixture into the eggs. After a few folds add the ground hazelnuts and continue. Fold just until things look combined and no longer streaky, be careful not to over-mix and deflate the eggs.
6. Pour into the prepared 8-inch spring form pan and bake for 45 minutes.
7. Allow the cake to cool in the pan before removing it. Dust the top with powdered sugar or cocoa powder. Serve on its own, with whipped cream, or ice cream.

This is the scale I use. All my baking recipes come in grams.
Here is an 8-inch spring form pan that comes with round parchment paper, win.
Here is my ride or die mini food processor.
Here is the Tony’s Chocoloney 70% chocolate that I use for everything.
